Writing a job text takes time, and time is what you do not have. You get a job title and a few lines from the hiring manager, or a bare vacancy drops in from your ATS with three lines of text and not a word about why anyone would want to work there. Publish it as it is, and the candidate decides in a second whether to click or to scroll on.
That is exactly the part the AI features in Booston take over. You paste your raw vacancy data and AI turns it into a complete, structured job: a title, the text blocks, the attribute values and, where possible, location and salary. In every language you have switched on, in one go. You sharpen existing jobs the same way, including the ones that come from your ATS. The end goal: from raw input to a complete, convincing job in a few minutes, without handing over control.
After this article you can create a new job with AI on your own, optimize an existing one, put the audience analysis to work and set the defaults behind the AI the way you want them. You find your jobs under Recruitment → Jobs, the AI settings under Campaigns & AI → AI.
Before you start
- AI has to be switched on for your environment. Check under Campaigns & AI → AI → Settings whether Status is on and whether there is an amount in Monthly AI Budget. Without a budget AI does not run, even with the switch on.
- The feature itself has to be on. Under Campaigns & AI → AI → Prompts, card Jobs, you find the Job text generation switch.
- If either one is off you see it straight away: the Create with AI card gets the label Not activated and the Optimize with AI button is grey. The tooltip tells you which of the four causes it is (AI off, text generation off, no budget, budget used up) and where to switch it on.
- The audience analysis is a separate feature with its own switch. See The audience analysis: writing for the people who actually apply.
- The dashboard is in English. The labels in this article appear exactly as they do on your screen.
What it gives you
This is not only about writing faster. Three things really change.
- Raw data becomes a complete job. A briefing from an email, loose notes or an export from your ATS is enough. AI writes the text blocks, picks the attribute values and fills empty fields such as city, postcode and salary range, as long as that information is in your source.
- Every language in one run. You select the languages and get them all back from the same source. You do not have to write English first and have it translated afterwards.
- You write for an audience instead of for a job profile. The audience analysis tells you who realistically applies, what drives that person and where they drop out. That is the difference between a tidy text and a text that converts.
What AI does not do: invent facts. A salary, a location, a company name or a requirement that is not in your source is never made up. And nothing changes in your job until you click Save.
Creating a new job with AI
All you have is a job title and a rough text? Then you do not have to fill in every field yourself.
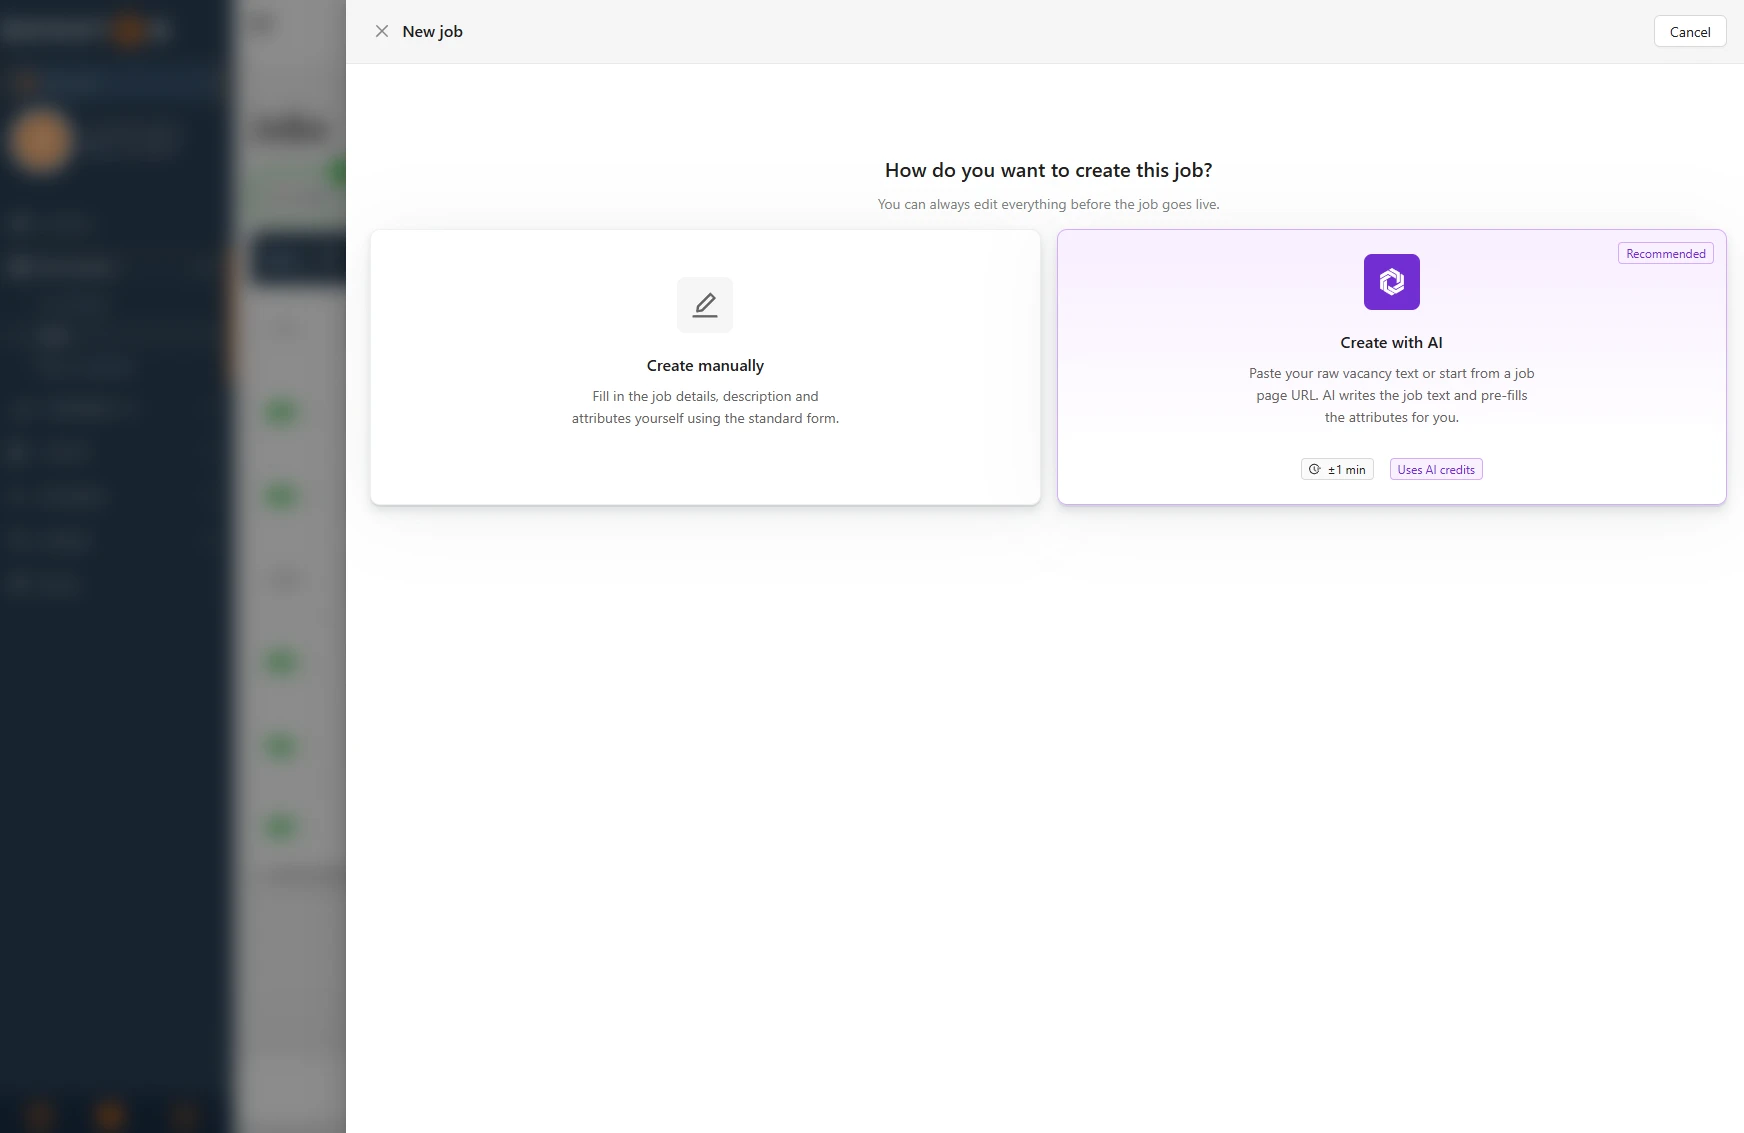
- Go to Recruitment → Jobs and click New job. The screen asks How do you want to create this job?
- Choose Create with AI. The other card, Create manually, is the standard form you know.
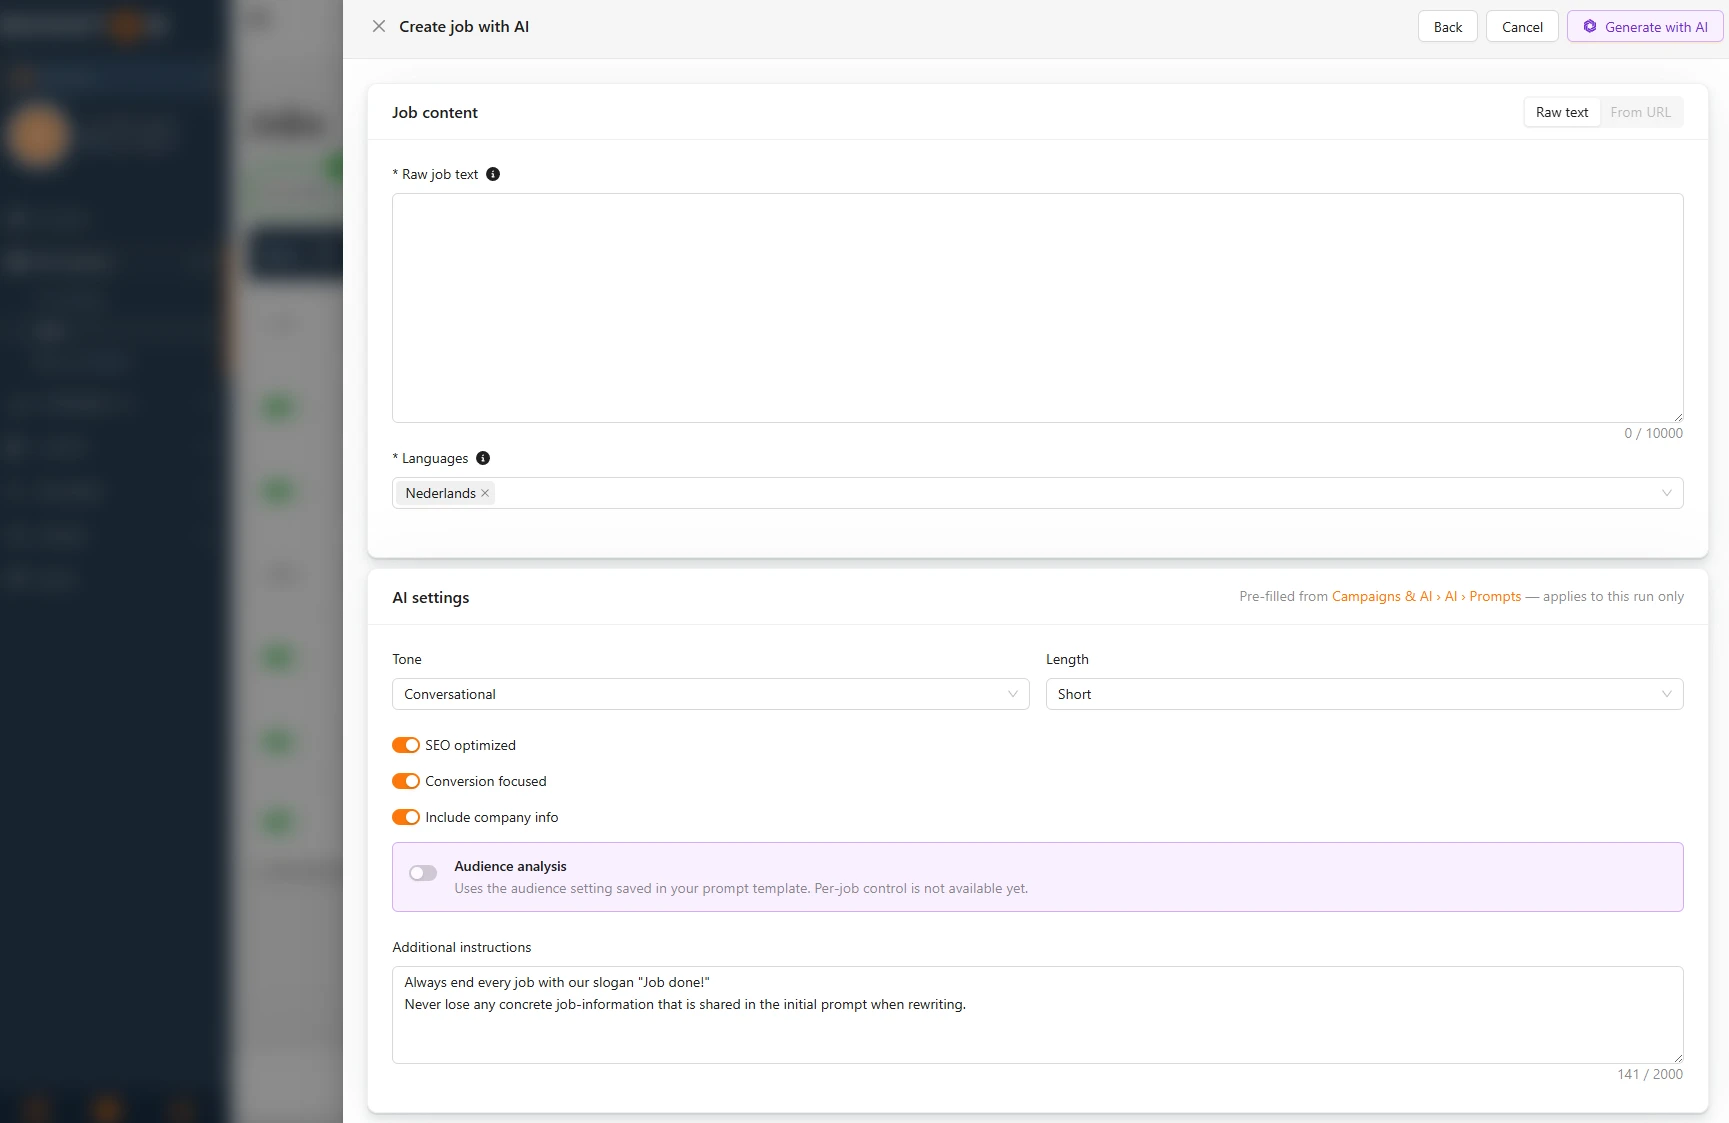
- In the Job content card, paste your vacancy data into Raw job text. An existing job text, a briefing, a copy from your ATS or loose notes: anything goes, up to 10,000 characters. Shorter than twenty letters is not accepted, because AI then has too little to build on.
- Under Languages, pick every language the job has to exist in. It is generated in all of them, from the same source.
- Walk through the AI settings card. It is pre-filled with your defaults and applies to this run only. See Every option in one table.
- Click Generate with AI and wait until the screen finishes with AI is drafting your job.
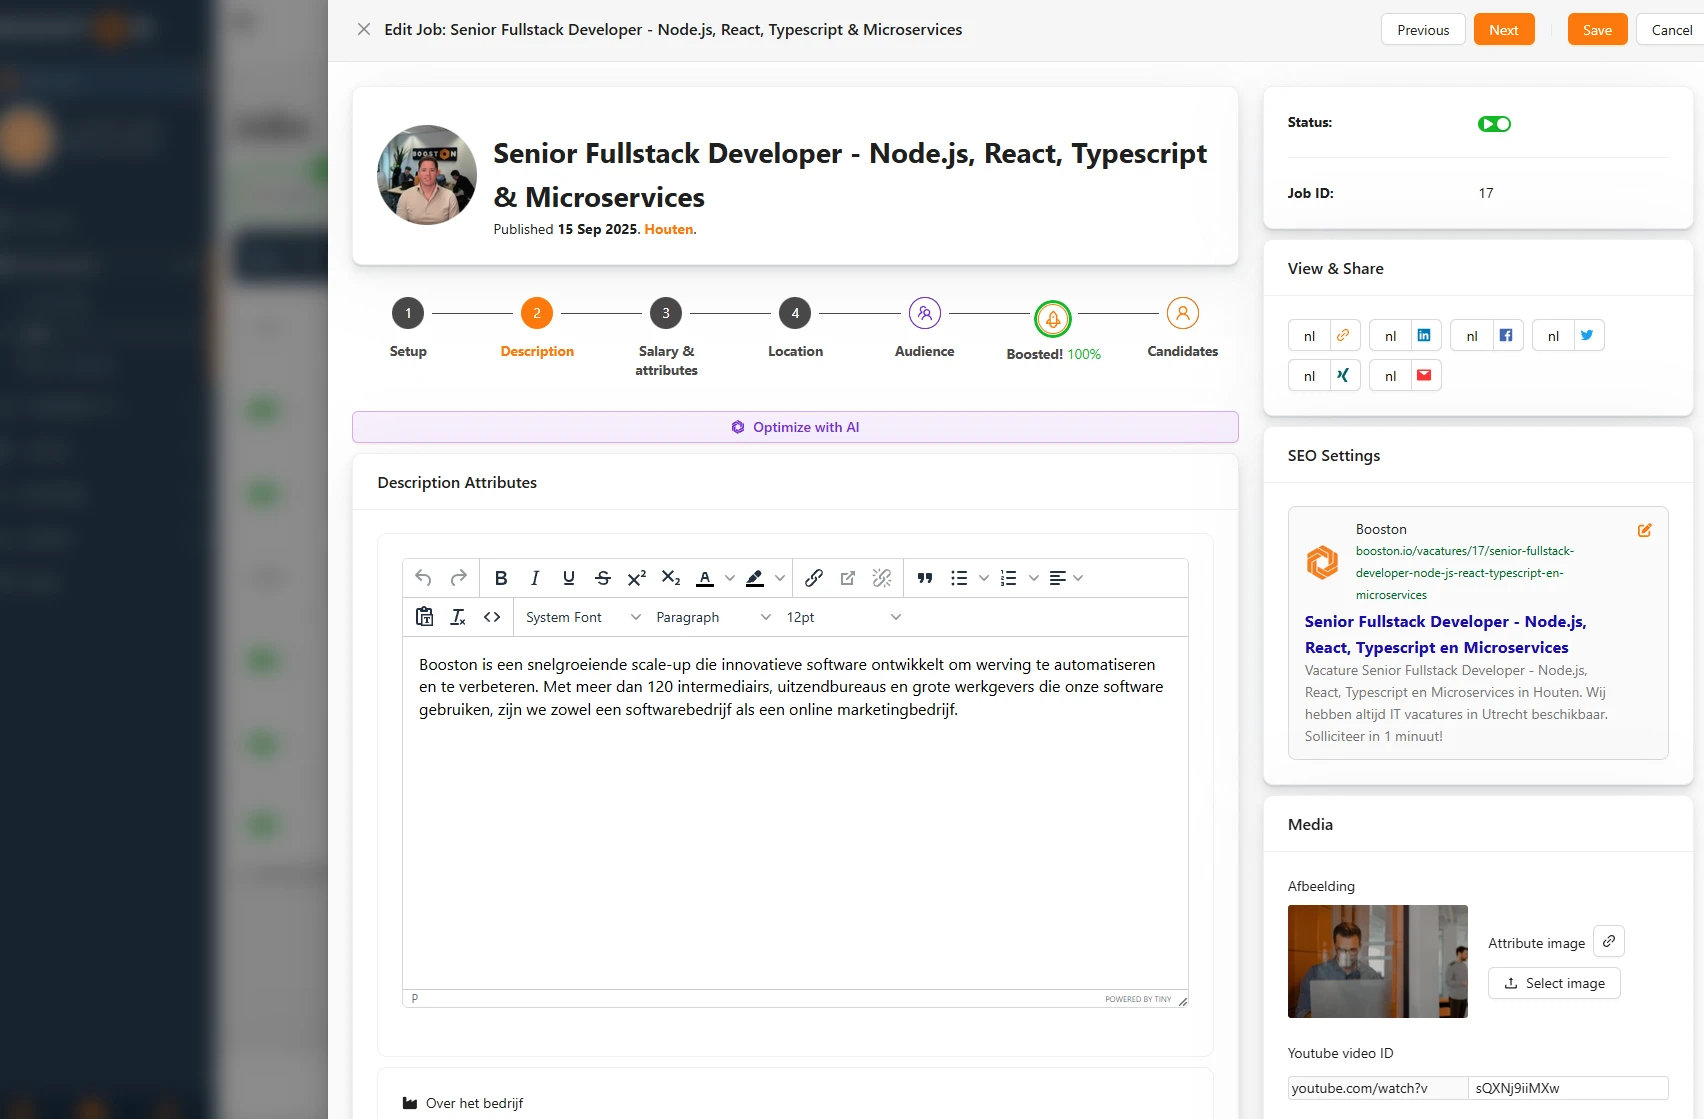
The job is then created and the job editor opens on the Setup step, with the message Job created. It asks you to review the AI-generated content and save what you want to keep. The steps Setup, Description, Salary & attributes and Location are pre-filled. Fields that AI filled carry the purple AI icon next to the label, with the tooltip Filled by AI.
The job is not live yet. You walk through the steps as usual, add what is missing, pick your recruiter and publication date and then activate it.
Optimizing an existing job with AI
Is there already a job whose text could be better? Then you use Optimize with AI. That works just as well on a job you wrote yourself as on one imported from your ATS.
- Open the job from Recruitment → Jobs. The Optimize with AI button sits directly under the step bar. You find it on the steps Setup, Description, Salary & attributes and Location.
- Click it. The Optimize job with AI wizard opens with two steps: Input and Review.
- On Input you see the Job card at the top with the job you are optimizing. That job's current title, description and attributes are the input for this run. Below it sits AI settings, again pre-filled and for this run only.
- Click Optimize job.
- On Review you see the proposal in three blocks: Job text with the title and the text blocks, with a tab per language, Attributes with proposed attribute values, and Location & salary. Nothing has been changed at this point, this is purely a review screen.
- Happy with it? Click Save. You get the confirmation "AI suggestions applied and saved." and the changed fields get the purple AI icon.
Not convinced? Click Back, adjust the settings and run again. If AI finds nothing to improve you see the message No suggestions. Cancel closes the wizard without changing anything.
What AI overwrites and what it leaves alone
- Texts are rewritten, but you see the proposal first.
- Attribute values are added, never removed. What you already selected stays. AI only picks from the values you set up yourself under Managing attributes for jobs and candidates, so no new values appear.
- Location and salary are only filled when the field is still empty and the information is clearly in the source. An existing city or salary range is left untouched.
The audience analysis: writing for the people who actually apply
Who realistically applies to this job, and what drives that person? That is a different question from who you are looking for. The Candidate audience analysis answers it per job and is a process of its own, separate from the writing. So you can run it without ever generating a text, and the other way around.
- Open an active job and go to the Audience step.
- If there is no analysis yet you see Discover who applies to this job. Click Run analysis. It usually takes 15 to 30 seconds, and you get the message Audience analysis completed once it is done.
- Has the job changed substantially? Then click Re-analyse. There you pick the Analysis depth (Quick or Thorough) per run and can add a Custom focus, for example "focus on passive candidates".
The result sits in two panels. Candidate & fit shows who your ideal candidate is and how well this job matches: an Audience snapshot with recognisable traits, a fit verdict and five Primary motivators ranked by weight. Optimize shows what you do with it: three Likely objections, three Conversion hooks and advice on Language & Tone.
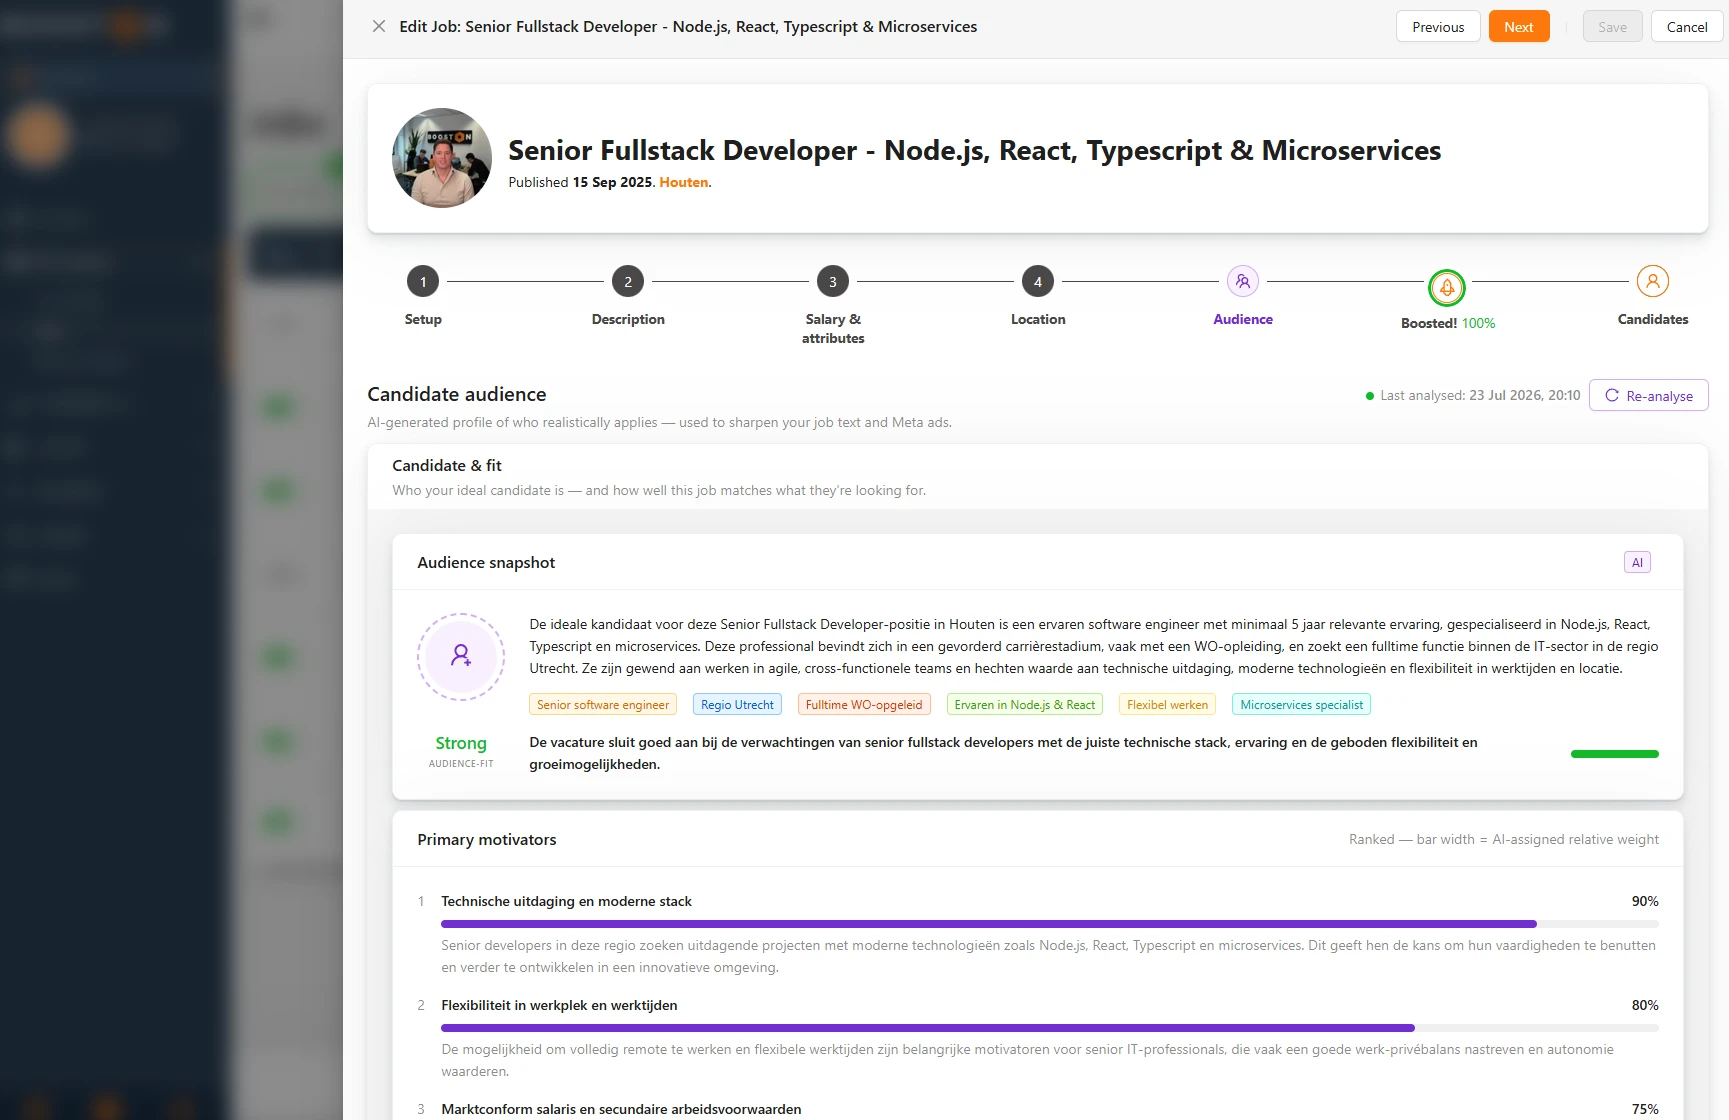
Each panel has a follow-up action underneath. Edit job takes you to the Description step to sharpen the text yourself. Optimize job text starts the AI optimization from this analysis, without going back to the step bar first.
How the analysis feeds your texts
In the Jobs card under Campaigns & AI → AI → Prompts, the Audience analysis option decides what happens with the audience analysis during text generation. You have four choices:
- Use if available, skip if not: use the analysis when there is one, and otherwise not.
- Run analysis first if missing, then optimize: if there is no analysis for this job yet, one is made first and AI writes the text from the result. So you do not have to visit the Audience step yourself first.
- Always run a fresh analysis before optimizing: always run a fresh analysis first.
- Don't use audience analysis: leave the analysis out.
That choice applies to both flows, so also when you create a new job with Create with AI. In the AI settings card you see it as an Audience analysis row that follows the setting from your prompt template.
Running analyses automatically
Under Campaigns & AI → AI → Prompts sits the Candidate audience analysis block with four settings: Enabled, the default Analysis depth, a fixed Custom focus and When to run the analysis. Set that last one to Automatically on job creation and every new job is analysed straight away, including jobs coming in through your ATS. Run on all active jobs (one-time batch) catches up your whole existing stock in one go.
Every option in one table
These options sit in the AI settings card on every run, whether you are creating or optimizing. They are pre-filled from Campaigns & AI → AI → Prompts, card Jobs, and apply only to the run in which you change them.
| Setting | What it does | When to use it |
|---|---|---|
| Tone | The tone of voice: Formal, Neutral or Conversational. | Pick what fits your audience and your employer brand. |
| Length | The length of the text: Short, Medium or Long. | Short for simple roles, long for detailed profiles. |
| SEO optimized | Writes the text so it is found well in search engines and on job platforms. | Switch it on when findability counts, so almost always. |
| Conversion focused | Puts more weight on what convinces the candidate to actually apply. | Switch it on for scarce audiences and hard-to-fill roles. |
| Include company info | Writes your company story from About the Company into the text. | Switch it on to present your organisation the same way in every job. |
| Audience analysis | Decides whether and how the audience analysis feeds in, in four variants. | Use the analysis when you want the text aimed at your audience. |
| Additional instructions | Free instructions for this run, up to 2,000 characters. | For example: "mention the four weeks of holiday" or "close with our slogan". |
| Languages | The languages the job is generated in. Only appears in Create with AI. | When optimizing, AI uses the languages the job already has. |
Jobs from your ATS
If your job comes from an ATS, nothing changes about the buttons: you optimize it in exactly the same way. What is added is that you can see two things separately.
The source data from your ATS. Fields your ATS fills are not editable in Booston. So you always see literally what your ATS delivers, without anyone typing into it by accident. Changing that text happens in your ATS itself.
What AI made of it. After an optimization that field holds the optimized text, with the purple AI icon next to it. Click that icon and you get a panel with the text as it was: Original ATS content, including which vacancy it came from and when it was last imported. Restore original puts that single field back. If your environment has no ATS, the same panel is titled Your text before AI and holds your own text from before the optimization. On a multilingual job the panel follows the language tab you are on.
A few more things worth knowing:
- Your optimization stays. An ATS update no longer overwrites your optimized text, not even the nightly full update. Only when that same information really changes on the ATS side does the ATS win: that one field then shows the new ATS text and the purple icon disappears. Other fields on the same job stay as they were.
- You can undo everything too. In the job editor, Restore all AI changes puts every optimized field on that job back to its original.
- You find the job by its old title. If the title was rewritten, the jobs overview shows the original ATS title as a muted second line, and the normal search on the Title column finds that title too.
- AI always writes from the original. Ad copy for Meta job ads, the audience analysis and a second optimization round all start from the original job text, not from text AI wrote earlier. That keeps every round anchored in what the vacancy actually says.
- Nothing goes back to your ATS. What you optimize in Booston is what Booston uses on your site and in your campaigns. Your ATS never notices.
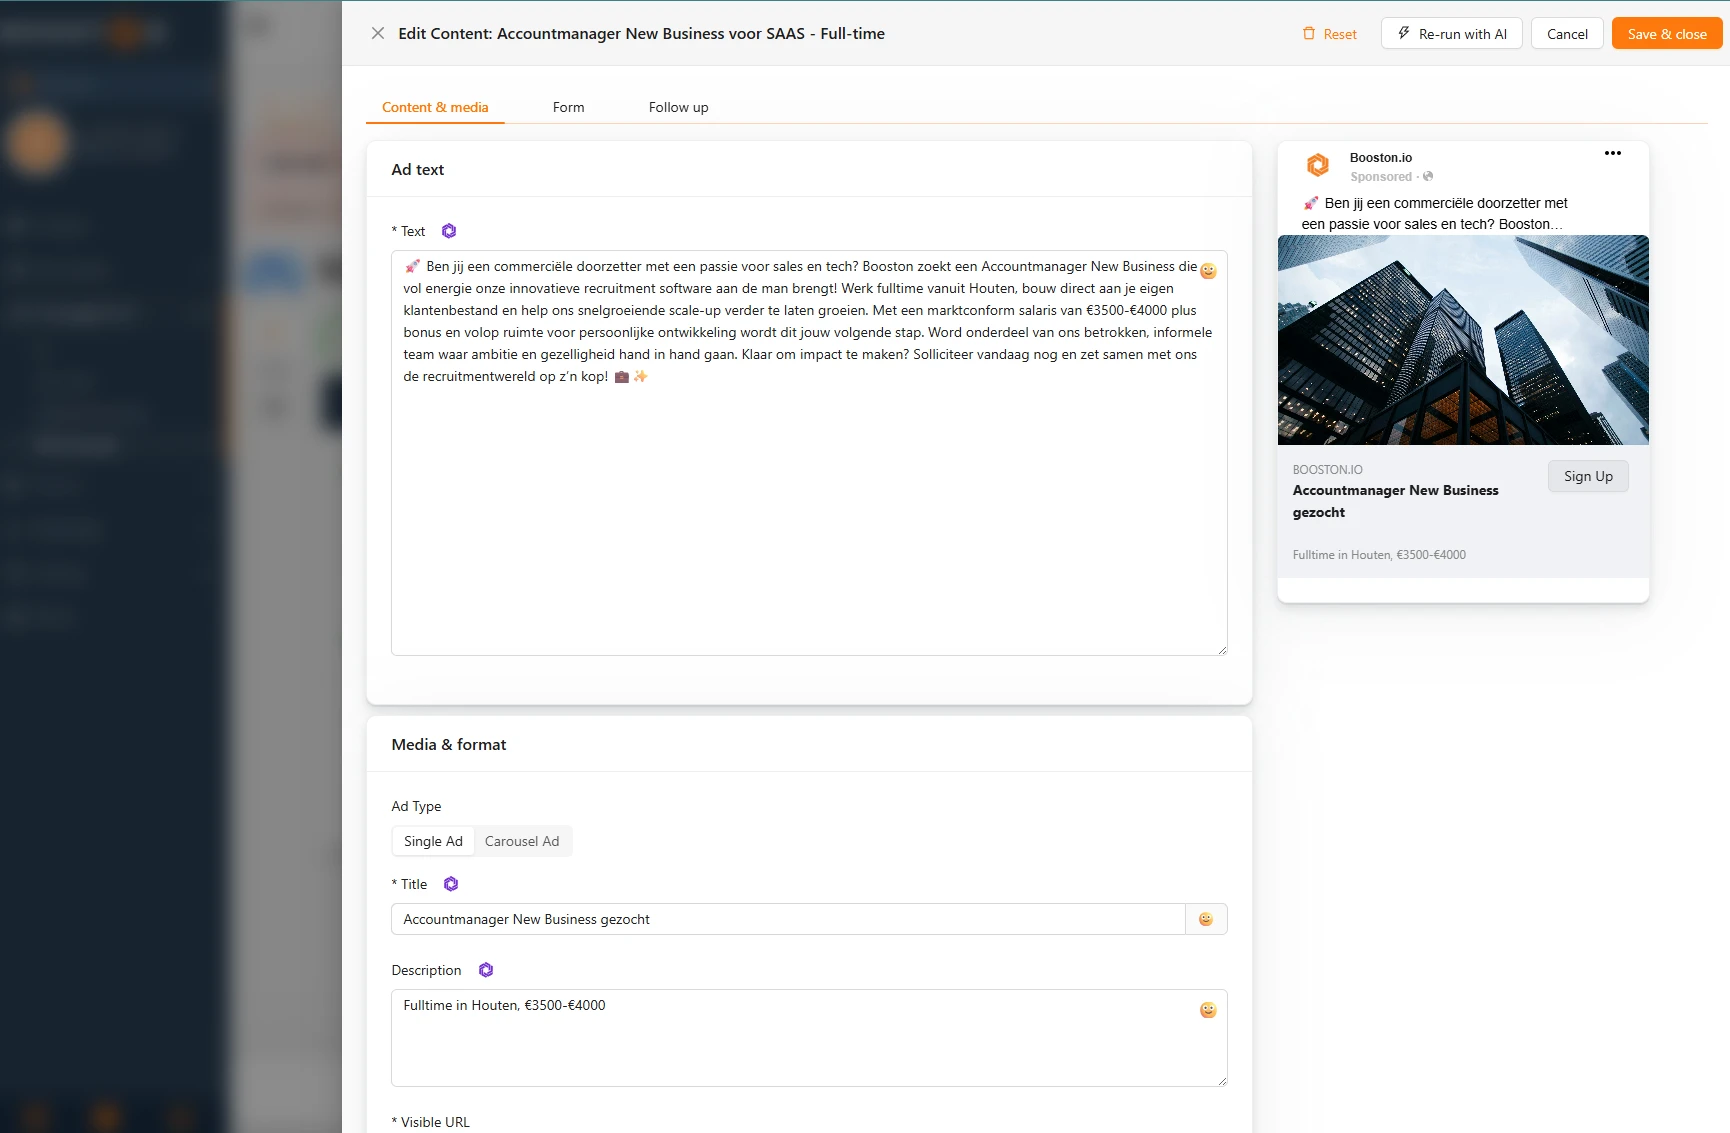
Which data travels between Booston and your ATS otherwise is covered in Connecting your ATS to Booston: which data travels back and forth.
Switching AI on and managing your default prompts
Everything AI does by default is set in one place: Campaigns & AI → AI. That screen has three tabs.
| Tab | What you are there for |
|---|---|
| Settings | The main Status switch and your Monthly AI Budget. This is where you start. |
| Prompts | What AI is allowed to do per area, and how it sounds. |
| Cost & Performance | What AI did and what it cost, per type of action and per job. |
Two cards under Prompts matter for job texts.
- General holds one field: About the Company. This is where you describe who you are as an employer. That text is written along as soon as Include company info is on, so you record your company story once instead of in every job.
- Jobs holds the Job text generation switch and below it your defaults for Tone, Length, SEO optimized, Conversion focused, Include company info, Audience analysis and Additional instructions. These are the values that pre-fill every run.
Additional instructions is where your house rules go. Think of "always mention the travel allowance", "use you instead of one" or "close every job with our slogan". They then apply to every job, in every language.
Setting up the module itself, the monthly budget and the cost overview are covered in detail in Switching on AI, setting it up and keeping track of your costs.
What you cannot arrange yourself
- Adding the AI module to your subscription. The Status switch lives in your own dashboard, but the module has to be on your subscription. Whether it is, you can see under Settings → General → Subscriptions.
- The data processing agreement for AI. You accept it yourself in the platform, but the text and its version come from Booston.
- The prompts behind the scenes. You steer AI through the settings and your own instructions. The underlying prompt itself cannot be edited. If your wish runs into that, let us know through support.
Good to know
- Every language in one run. AI generates the text for each selected language in the same run and translates from your source where a language is missing or thinner. Every language has its own tab in the preview.
- You stay in control. A proposal is only applied when you click Save while optimizing, or when you save the created job while creating. After that you can edit every field yourself as usual.
- The AI icon stays visible. Even when you open the page again later, the purple icon shows which fields AI filled and what still needs checking.
- Every run costs budget. Under Campaigns & AI → AI → Cost & Performance you see the usage per job, in the columns Job Text Generation and Candidate Audience Analysis. With an ATS connection the Job ATS ID column is there as well.
Frequently asked questions
The Optimize with AI button is grey. How come?
One of four things: AI is off for your environment, Job text generation is off, no monthly budget is set, or this month's budget is used up. The tooltip on the button says which of the four it is and where to switch it on.
I do not see the Audience step, or it is greyed out.
The audience analysis is off for your environment, or the job is not active. A paused, not yet published or expired job has to be activated first. The message at the top of the step says which of the two it is.
Does AI overwrite my existing texts?
When optimizing you see the proposal in Review first, and nothing changes until you click Save. Attribute values are only added, and location and salary only filled when the field was still empty.
Can I undo an optimization?
Yes. Click the purple AI icon next to the field and choose Restore original, or use Restore all AI changes to put the whole job back.
Does this work for jobs from my ATS?
Yes, and your optimization stays until the information in your ATS itself changes. See Jobs from your ATS.
How much text can I paste into Create with AI?
Up to 10,000 characters, and at least twenty letters. If you are over that, cut the part that is not about this role, for example a standard company story. You are better off having that written in through Include company info.
What happens when AI finds no improvements?
You see the message No suggestions. Go back to Input, pick a different length or add an extra instruction, and run again.
Can I see what it costs?
Yes, under Campaigns & AI → AI → Cost & Performance you see the usage per type of action and per job.
Coming soon
- Starting from a URL. Next to Raw text, Create with AI gets a From URL source: you paste the link to an existing job page and AI works from there. Every other field stays the same.
- Choosing per run what the audience analysis does. The Audience analysis option gets its own switch in the AI settings card, so you turn it on or off per job without changing your default. The wizard then gets a third step whenever the analysis runs.
- Uploading a document as the source. Besides pasting and a URL, it will become possible to use a PDF or Word file as the job source.
- Undoing all AI optimizations at once. Under Campaigns & AI → AI → Prompts an action is coming that puts every optimized job back to its original text. Useful when you want to adjust your settings and start over.
Need help?
Stuck, or is AI not delivering what you expect? Email support@booston.io or call 085 0044 215 and mention:
- the name of your environment;
- which job it concerns;
- what you want to achieve, or the message you see.
Would you rather walk through your defaults together? Book a free 30-minute online demo and we will go through it with you. Job Done!


