Within Booston, a page is a way to present content to your users. All of your pages together form your website and optionally candidate journeys for campaigns. You will need to create pages or edit existing pages to build a recruitment website that aligns with your goals.
In this article, we explain how to create a page, how to add content to the page using page components, and how to link the page to other pages on your website. Tip: If you haven’t yet read the article on page components, we highly recommend doing so here.
Contents
- Creating a page
- Setting up a page: content tab
- Setting up a page: settings tab
- Adding page elements
- Managing page elements
- Adding a page to your website structure
- Managing pages
- Conclusion
- FAQ
Creating a page
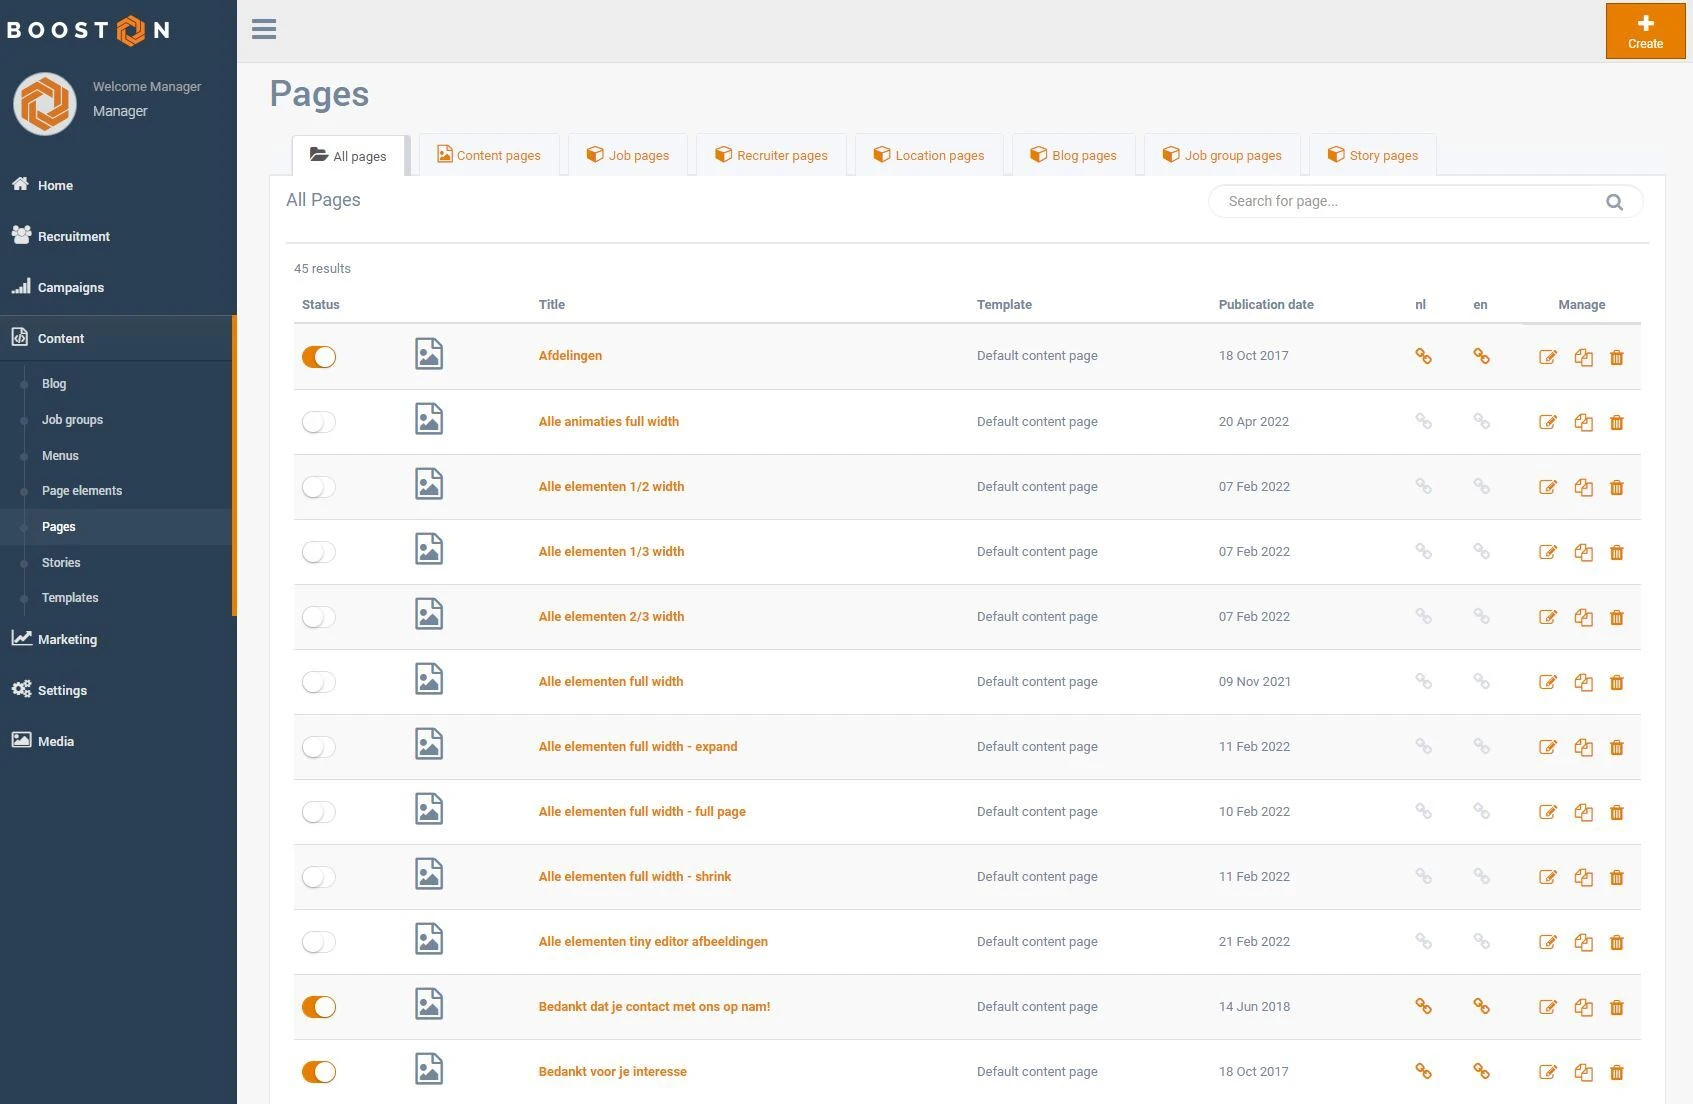
Go to: Content > Pages
Here you will find a list of all pages, both active and inactive.
First, we will explain how to create a page from scratch. Once you are familiar with the creation process, it will also be possible to manage or reuse an existing page.
To create a page, go to: Content > Pages > click on the 'Create' button > choose your languages > select a template (in this example, we choose the most common 'Standard Content Page') > click 'Continue' > enter a page title > choose a template layout > click 'Save'
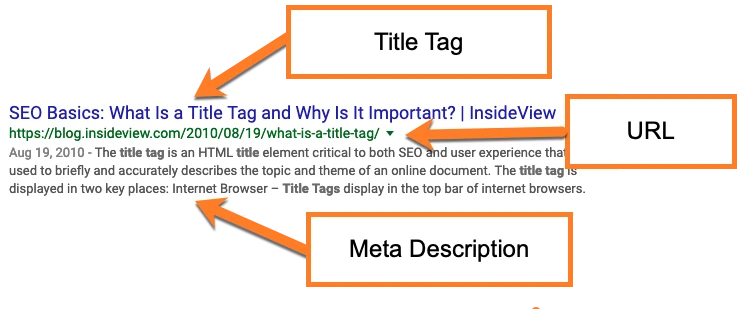
We have now created and activated a new page. Note, the page is now active and can be found and listed (or 'indexed') by search engines such as google.com. The title you used determines your title tag and URL, which you can find on the settings tab. More about the title tag, URL, and description tag will be covered in a later chapter. Now, we focus on the 'content tab' to add the necessary content.
Setting up a page: content tab
Now that we have created a sample page, we can see all the sections that make up the content tab of the page:
- Page Information
- Main Settings
- Element Sections for Adding Page Components
![inhoudstab]()
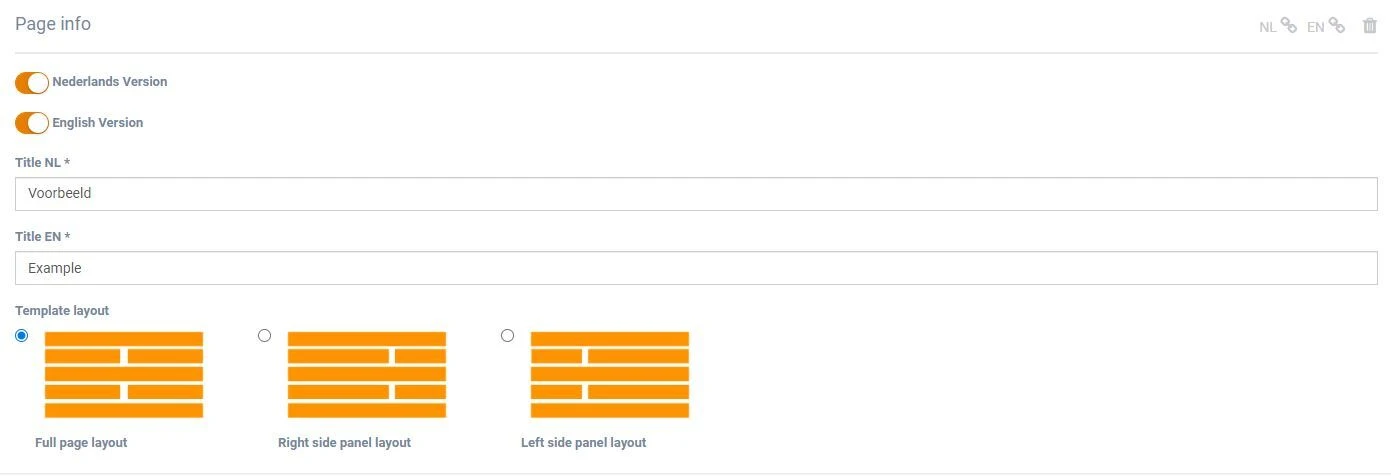
In the page information section, we can modify previously set options, such as the languages, the title of the page, and the template layout. The template layout determines whether you have content in 1 column, 2 columns with a 50%/50% split, or 2 columns with one column smaller, which can be ideal for supporting elements such as contact forms. This smaller sidebar section can be placed on either the left or right side. More about the template layout in the 'adding page elements' chapter.
Note the top right corner of the screen. There you will find a link icon for each language. When you click on the link, your page will be loaded in a new tab as it will appear to your website visitors.
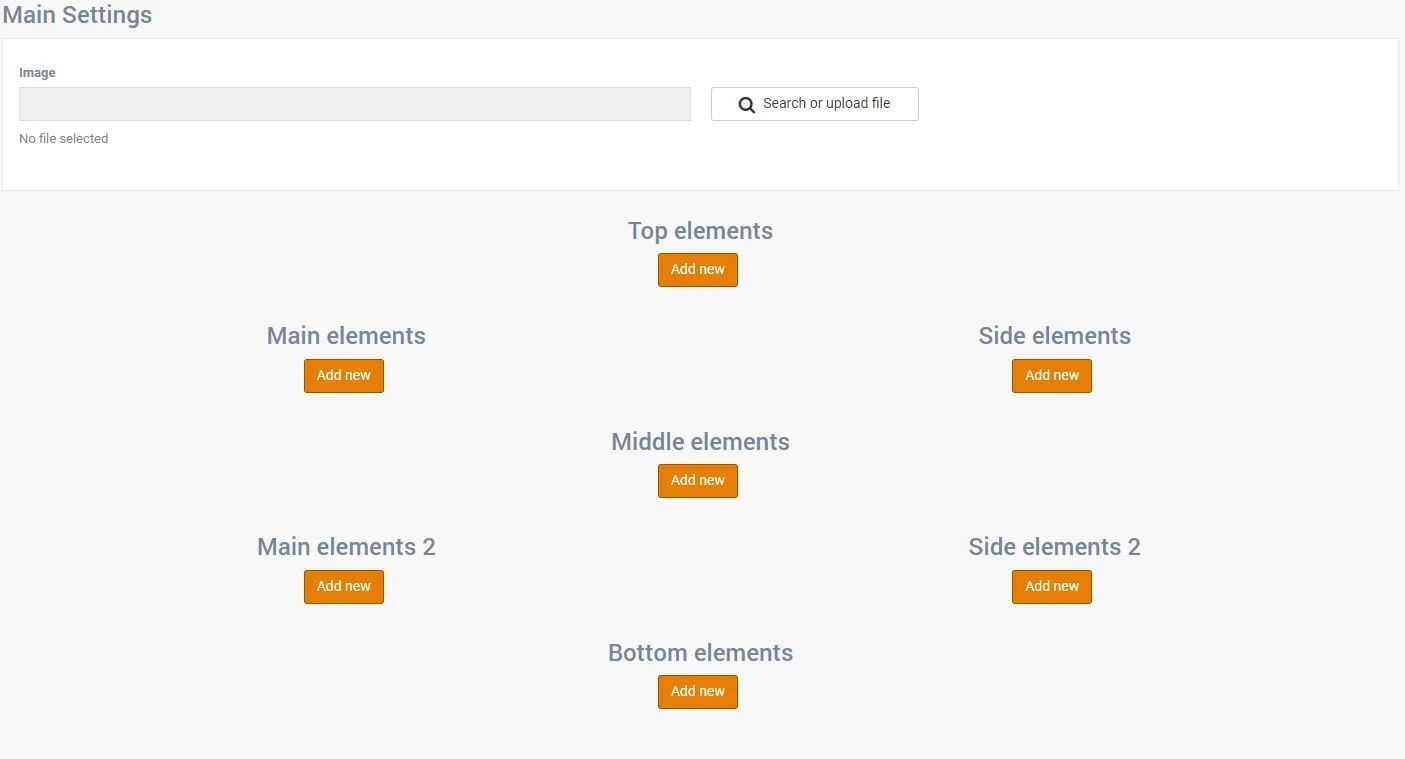
The second part of the content tab contains the main settings and the different sections of your chosen template layout. Here we add your content using page elements. Page elements are essentially the building blocks that make up the content of your page. But before we do that, let’s take a look at the settings tab of the page.
Een pagina instellen: instellingen-tab
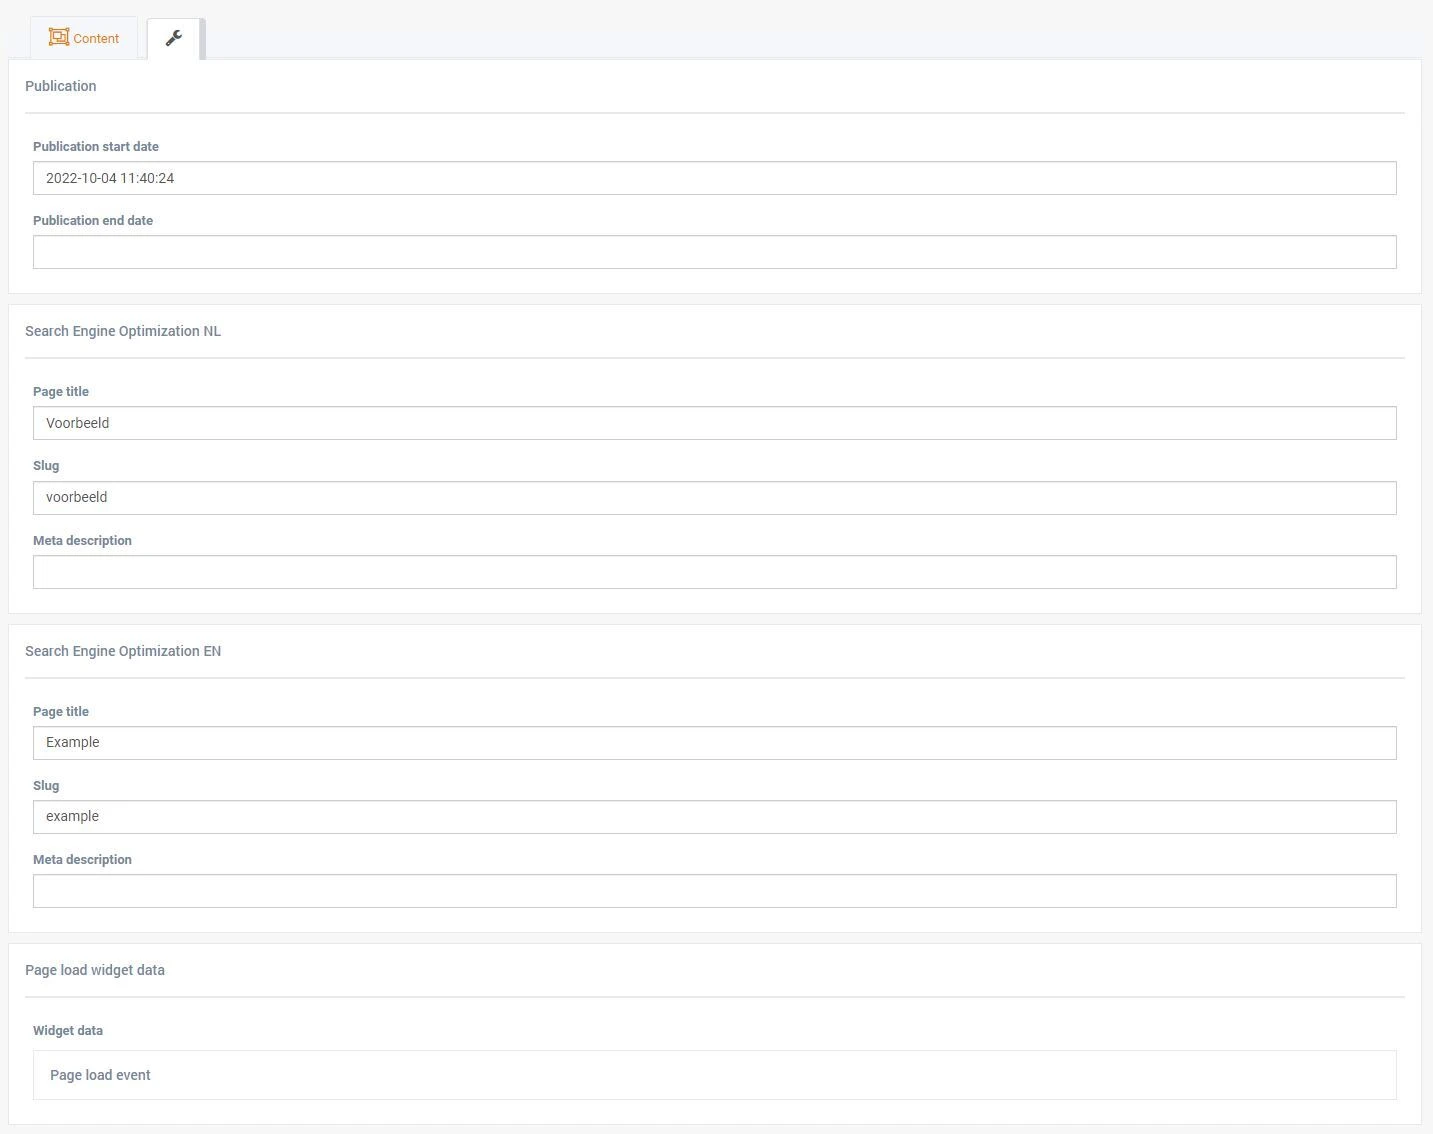
As mentioned earlier, the title you used to create your page was used for both your title tag and your page URL (or slug).
If you want, you can change your page title, page URL (or slug), and add a relevant meta description. Don't forget that all of these values have an impact on search engines like google.com.
By ensuring that the title tag, URL, and meta description are relevant, you may be able to improve your ranking in the mentioned search engines.
Finally, you will see a section called 'Page Load Widget Data'. This is for advanced users only. You can use this section to create scripts, load data layers, or load external scripts (like JavaScript) for marketing purposes. This data is output in the HTML markup of your page. More about Marketing & Data can be found in the marketing section of this knowledge base.
In summary, we now have a page:
- That is activated in the languages you want.
- That has a URL based on your page title, visible to both you and your website visitors.
- That has a custom title tag and description tag according to your preferences, so search engines can index it.
What we still need to do is add content and link the page to a menu or other pages to make it accessible to your audience. In the next chapter, we will add content by adding page elements.
Adding Page Elements
Let’s start by adding simple text to the website.
Click on the top button 'Add New' > select a paragraph page element > preview to make sure it’s the desired element > click Save
You can now add more and different page elements in the same way. Make sure to test all the different possibilities.
For this example, we will now add 2 more page elements:
- A branded row, which is a more visual block to add some images alongside some textual content
- An application form so that a visitor can leave their open application
This indicates that the page element is now customized for this page.
Summary on Managing Page Elements: Try to always take over the content of the page element, if possible. A change in the main page element will then affect every page that uses the corresponding page element. This can really speed up the process when you want to change an image on a page element that is used on multiple pages. However, often this is not possible, and you may only want to change the content for a specific page. Creating custom content as described is the quickest way to achieve your goal.
Adding a Page to Your Website Structure
A final step is to add your page to the structure of your entire website. This is done by creating a link to your page. One way to do this is by adding a link to an existing page that points to your new page. Another way is to add your new page to the main menu. Adding your page to the main menu can be done as follows:
Managing Pages
Now that we know how to create a page, add content to the page using page elements, and link the page to a menu to make it accessible to users, managing all your pages becomes an easy task. For an overview of all pages, you can go back to:

Content > Pages
Via the edit button of a page or by clicking on the page title, you will return to the content tab of the page where you can manage all your settings that were discussed in previous chapters.
You will also see a copy button. This can speed up your content management. When you copy a page, all settings and page elements are duplicated to a new page. You can then edit your newly created page by simply editing the already set page elements.
Conclusion
Be sure to check out the Booston preview website for many example pages that are created exactly as described here.
FAQ
- Will my page be indexed by Google?
Yes. Active pages are added to the robots.txt list (go to yourboostondomain.com/robots.txt) and are eligible for indexing. If you do not want your page to be indexed and visible to users, pause your page in the page list (content > pages). Note that you can still view the page, but your visitors cannot. They will be redirected to the 404 page.


