With Booston’s job boards module, you manage all your paid job postings centrally. In this article, you will learn how the module works, how to set up campaigns and define budgets, and how to analyze and optimize performance using our dashboards. This lets you extract more value from every euro spent and maintain control over your recruitment campaigns.
Table of contents:
- What does it do?
- Structuring campaigns
- Budgets
- Managing campaigns
- Campaign overview
- Cost & performance
- Optimizing campaigns
1. What does it do?
With the job boards module, you publish vacancies via one central connection to dozens of platforms such as Indeed, Jobbird and Nationale Vacaturebank. No need to log in manually or sign separate contracts: everything is handled through Booston.
The benefits:
|
Reach: Automatic, smart buying across almost all platforms. |
Time savings: No separate uploads or duplicate entry, everything consolidated. |
|
Control: Campaigns are flexible to set up and manage. |
Data: Performance visible instantly in dashboards. |
2. Structuring campaigns
You decide how to structure your campaigns. Examples:
- Everything in one campaign: automatically collect all vacancies in a single campaign.
- Boost button: select manually which vacancies enter a campaign via the Boost button in Booston or in your ATS.
- Smart rules: automatic assignment based on vacancy data. Example: If discipline = Marketing, then place in the Marketing campaign.
2.1 Budgets
For each campaign you set a maximum monthly budget. This is the ceiling; we only invoice what is actually spent.
Optionally, you can set weekly limits. This spreads spending and prevents a campaign from draining in the first week.
3. Managing campaigns
Now that you have defined the purpose of your campaign, it is time to configure it.
In the Booston dashboard you can do this easily, without involving a marketer or external party.
Here we show you step by step how to configure your campaign, allocate budgets and select platforms.
This gives you full control and speed.
3.1 Campaign overview
First a short introduction of what you can find here. In the dashboard you see per campaign:
- Current budgets and spend to date.
- The number of vacancies in the campaign.
- The platforms where budget has been used (Indeed, Nationale Vacaturebank, Jobbird, etc.).
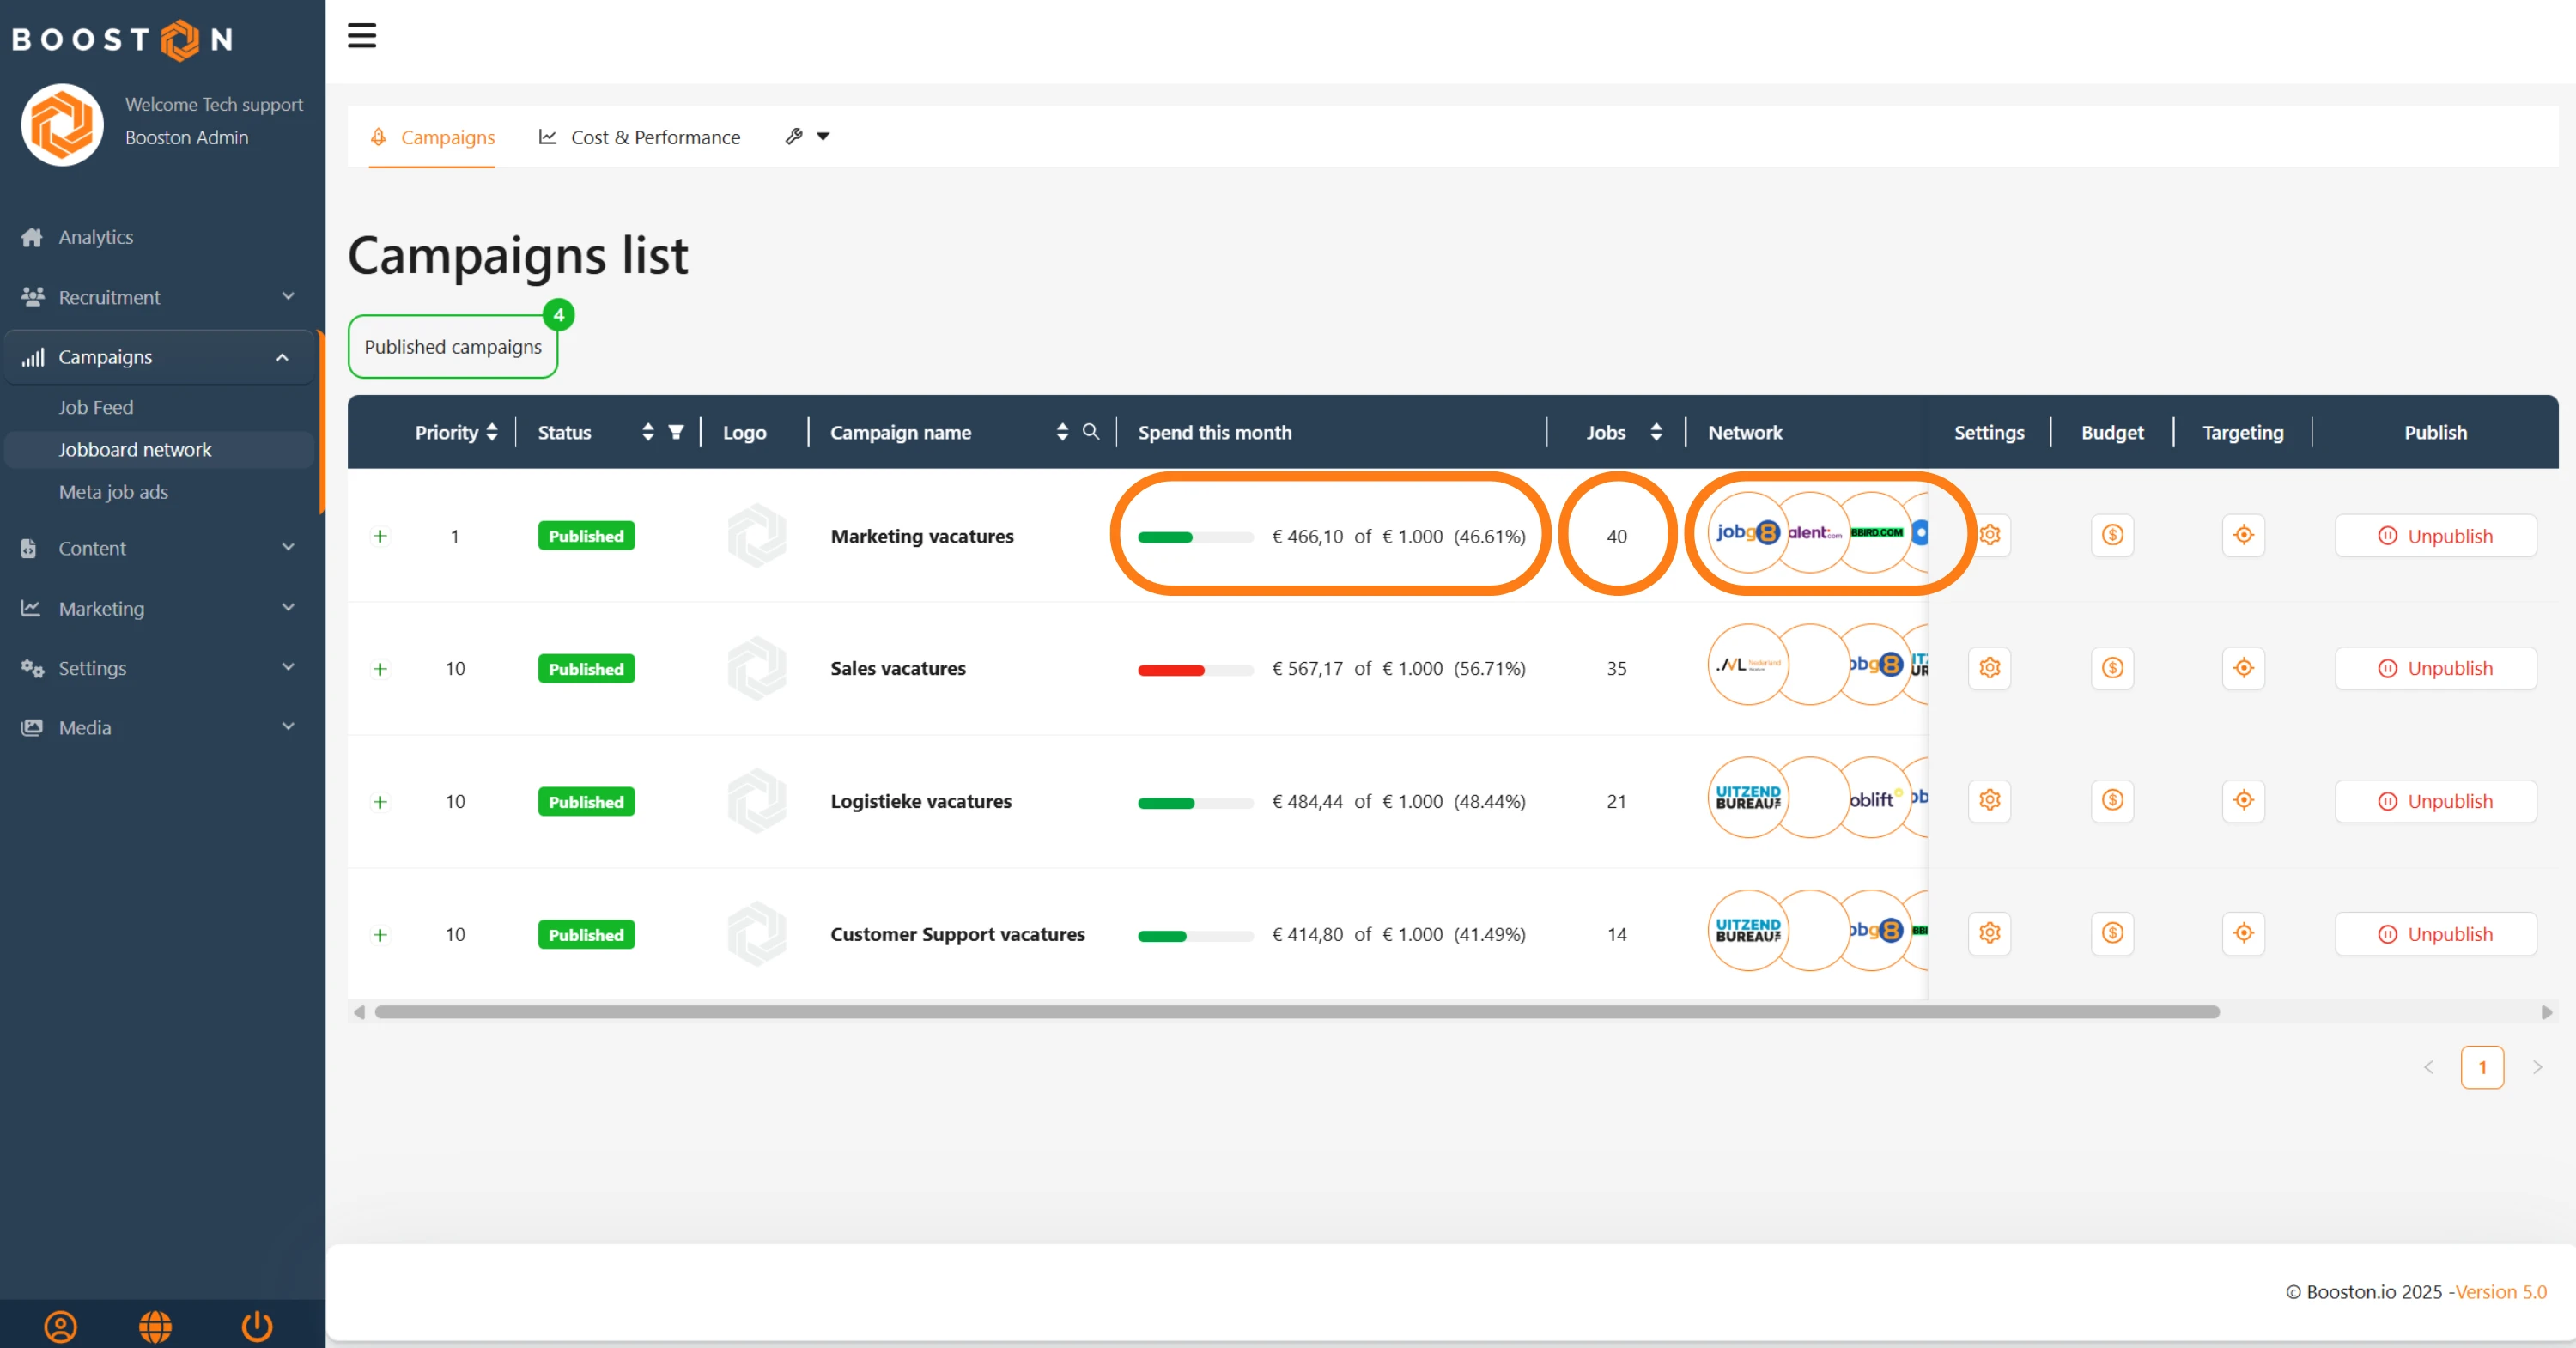
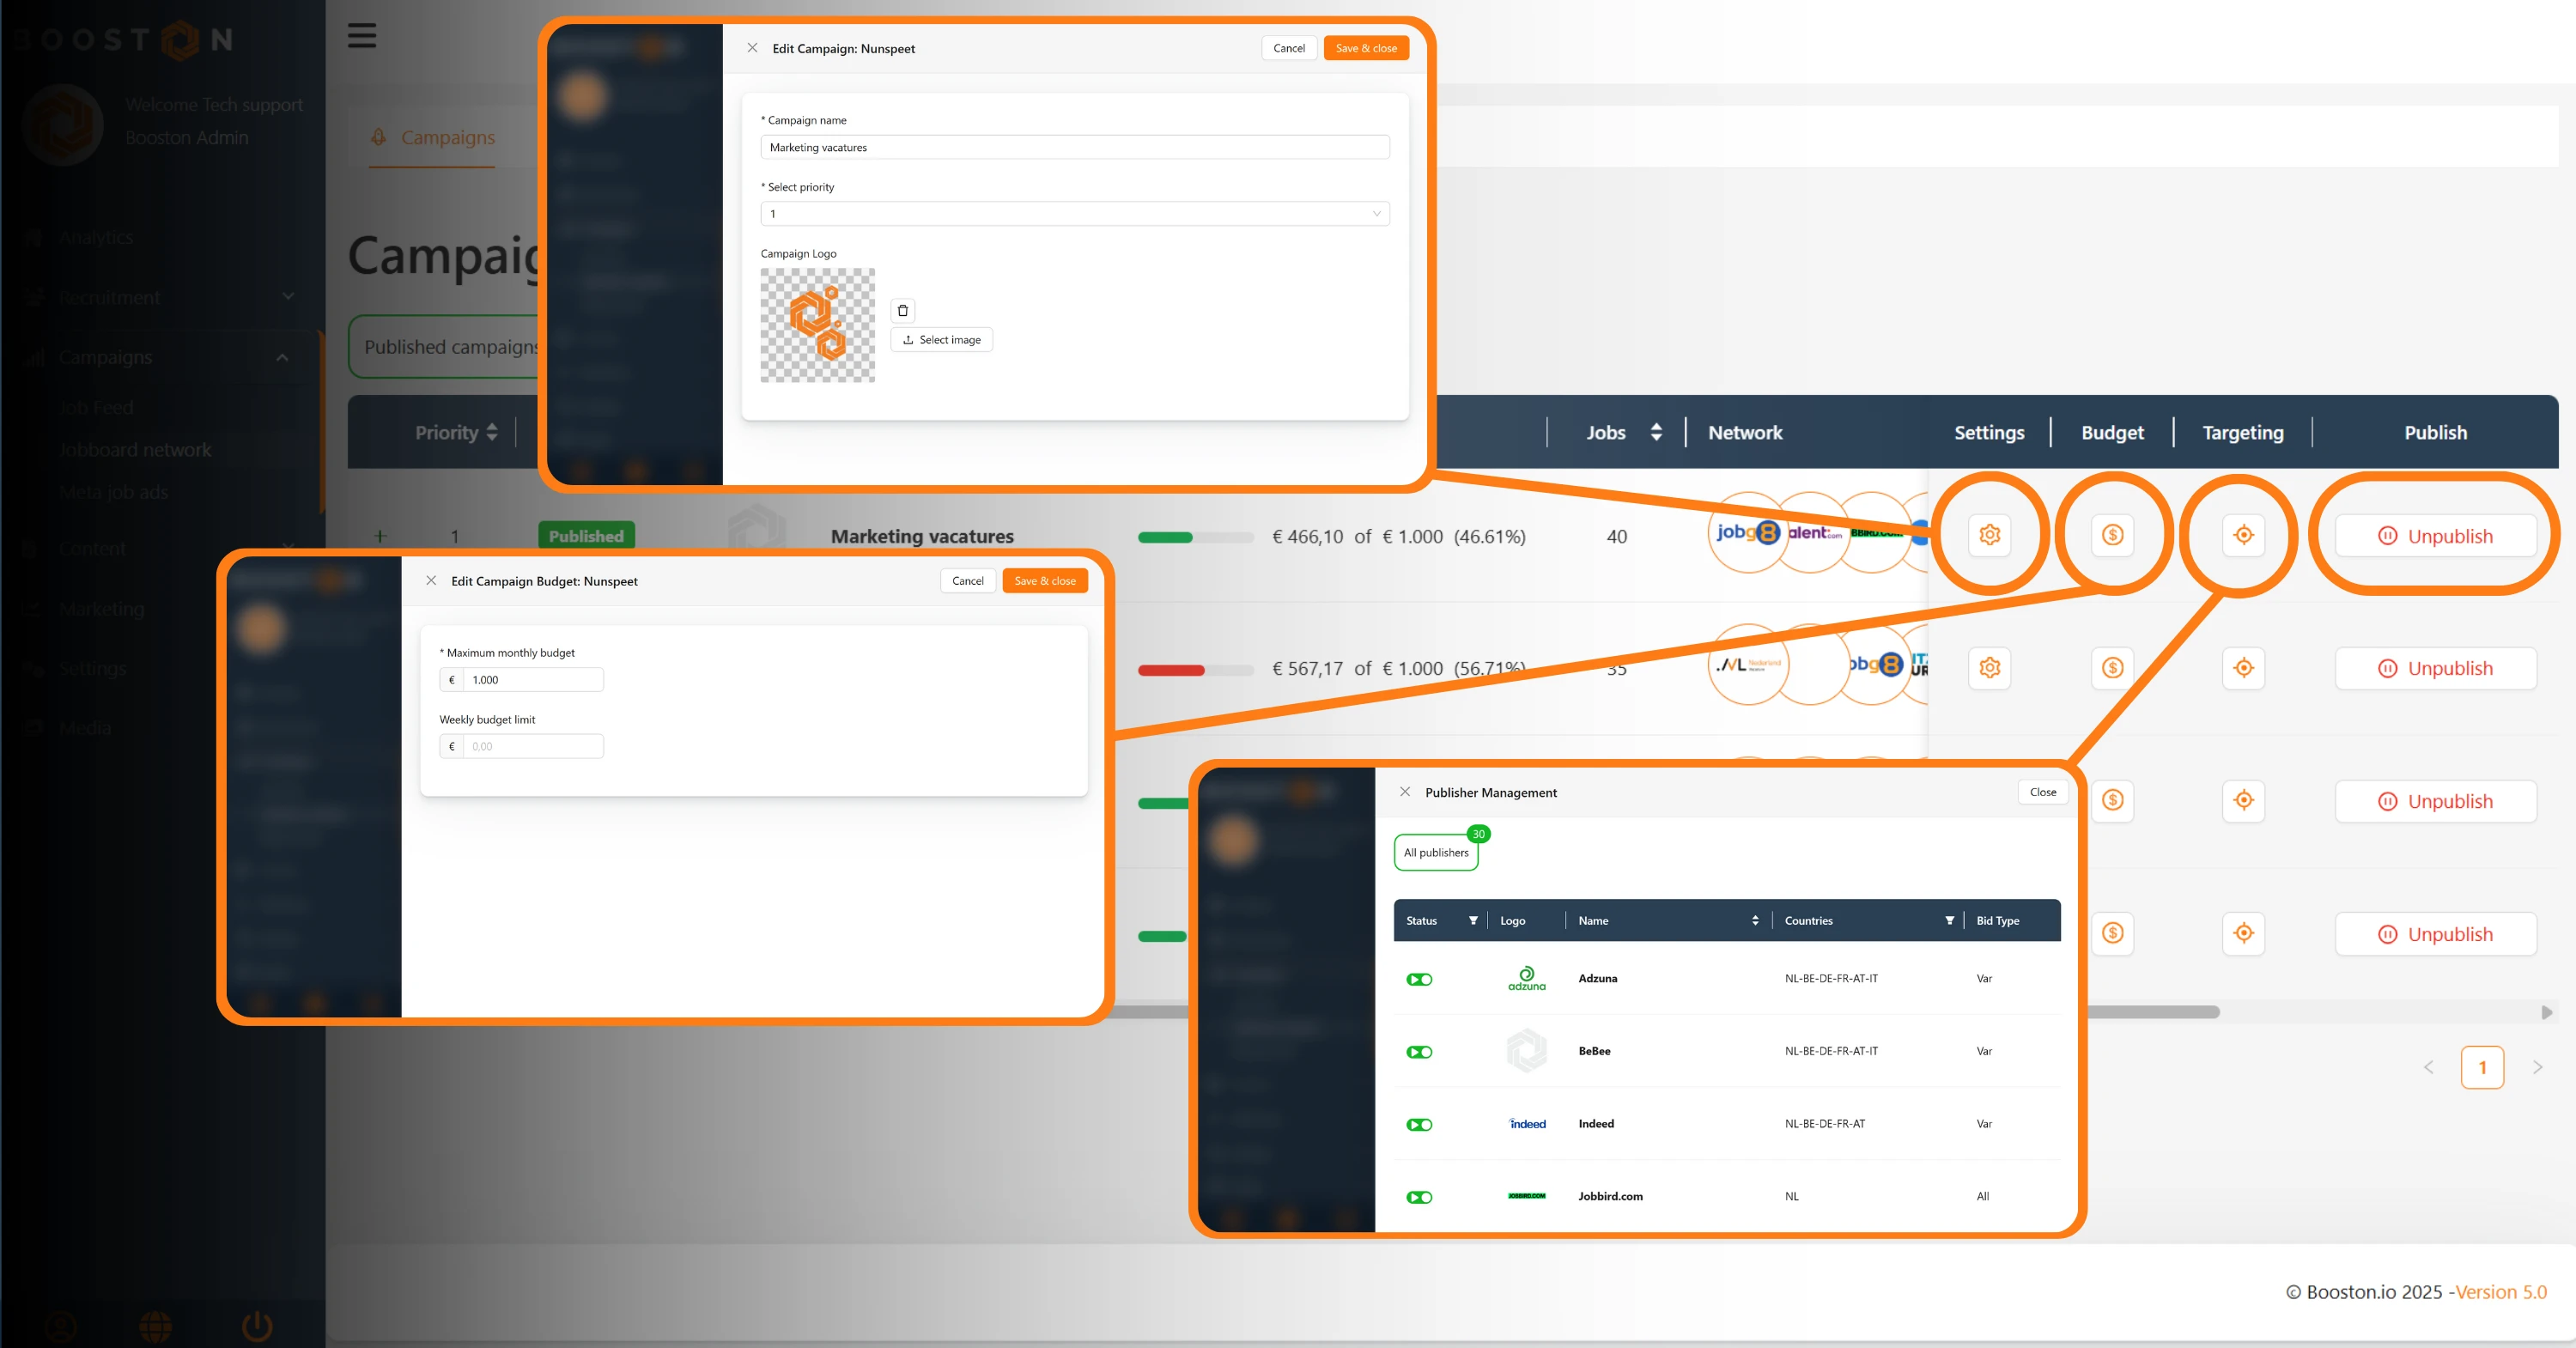
Available options in this view:
- Publish or pause the campaign.
- Edit settings: campaign name, logo and priority.
- Manage budget: adjust monthly budget and optional weekly limit.
- Targeting: enable or disable platforms.
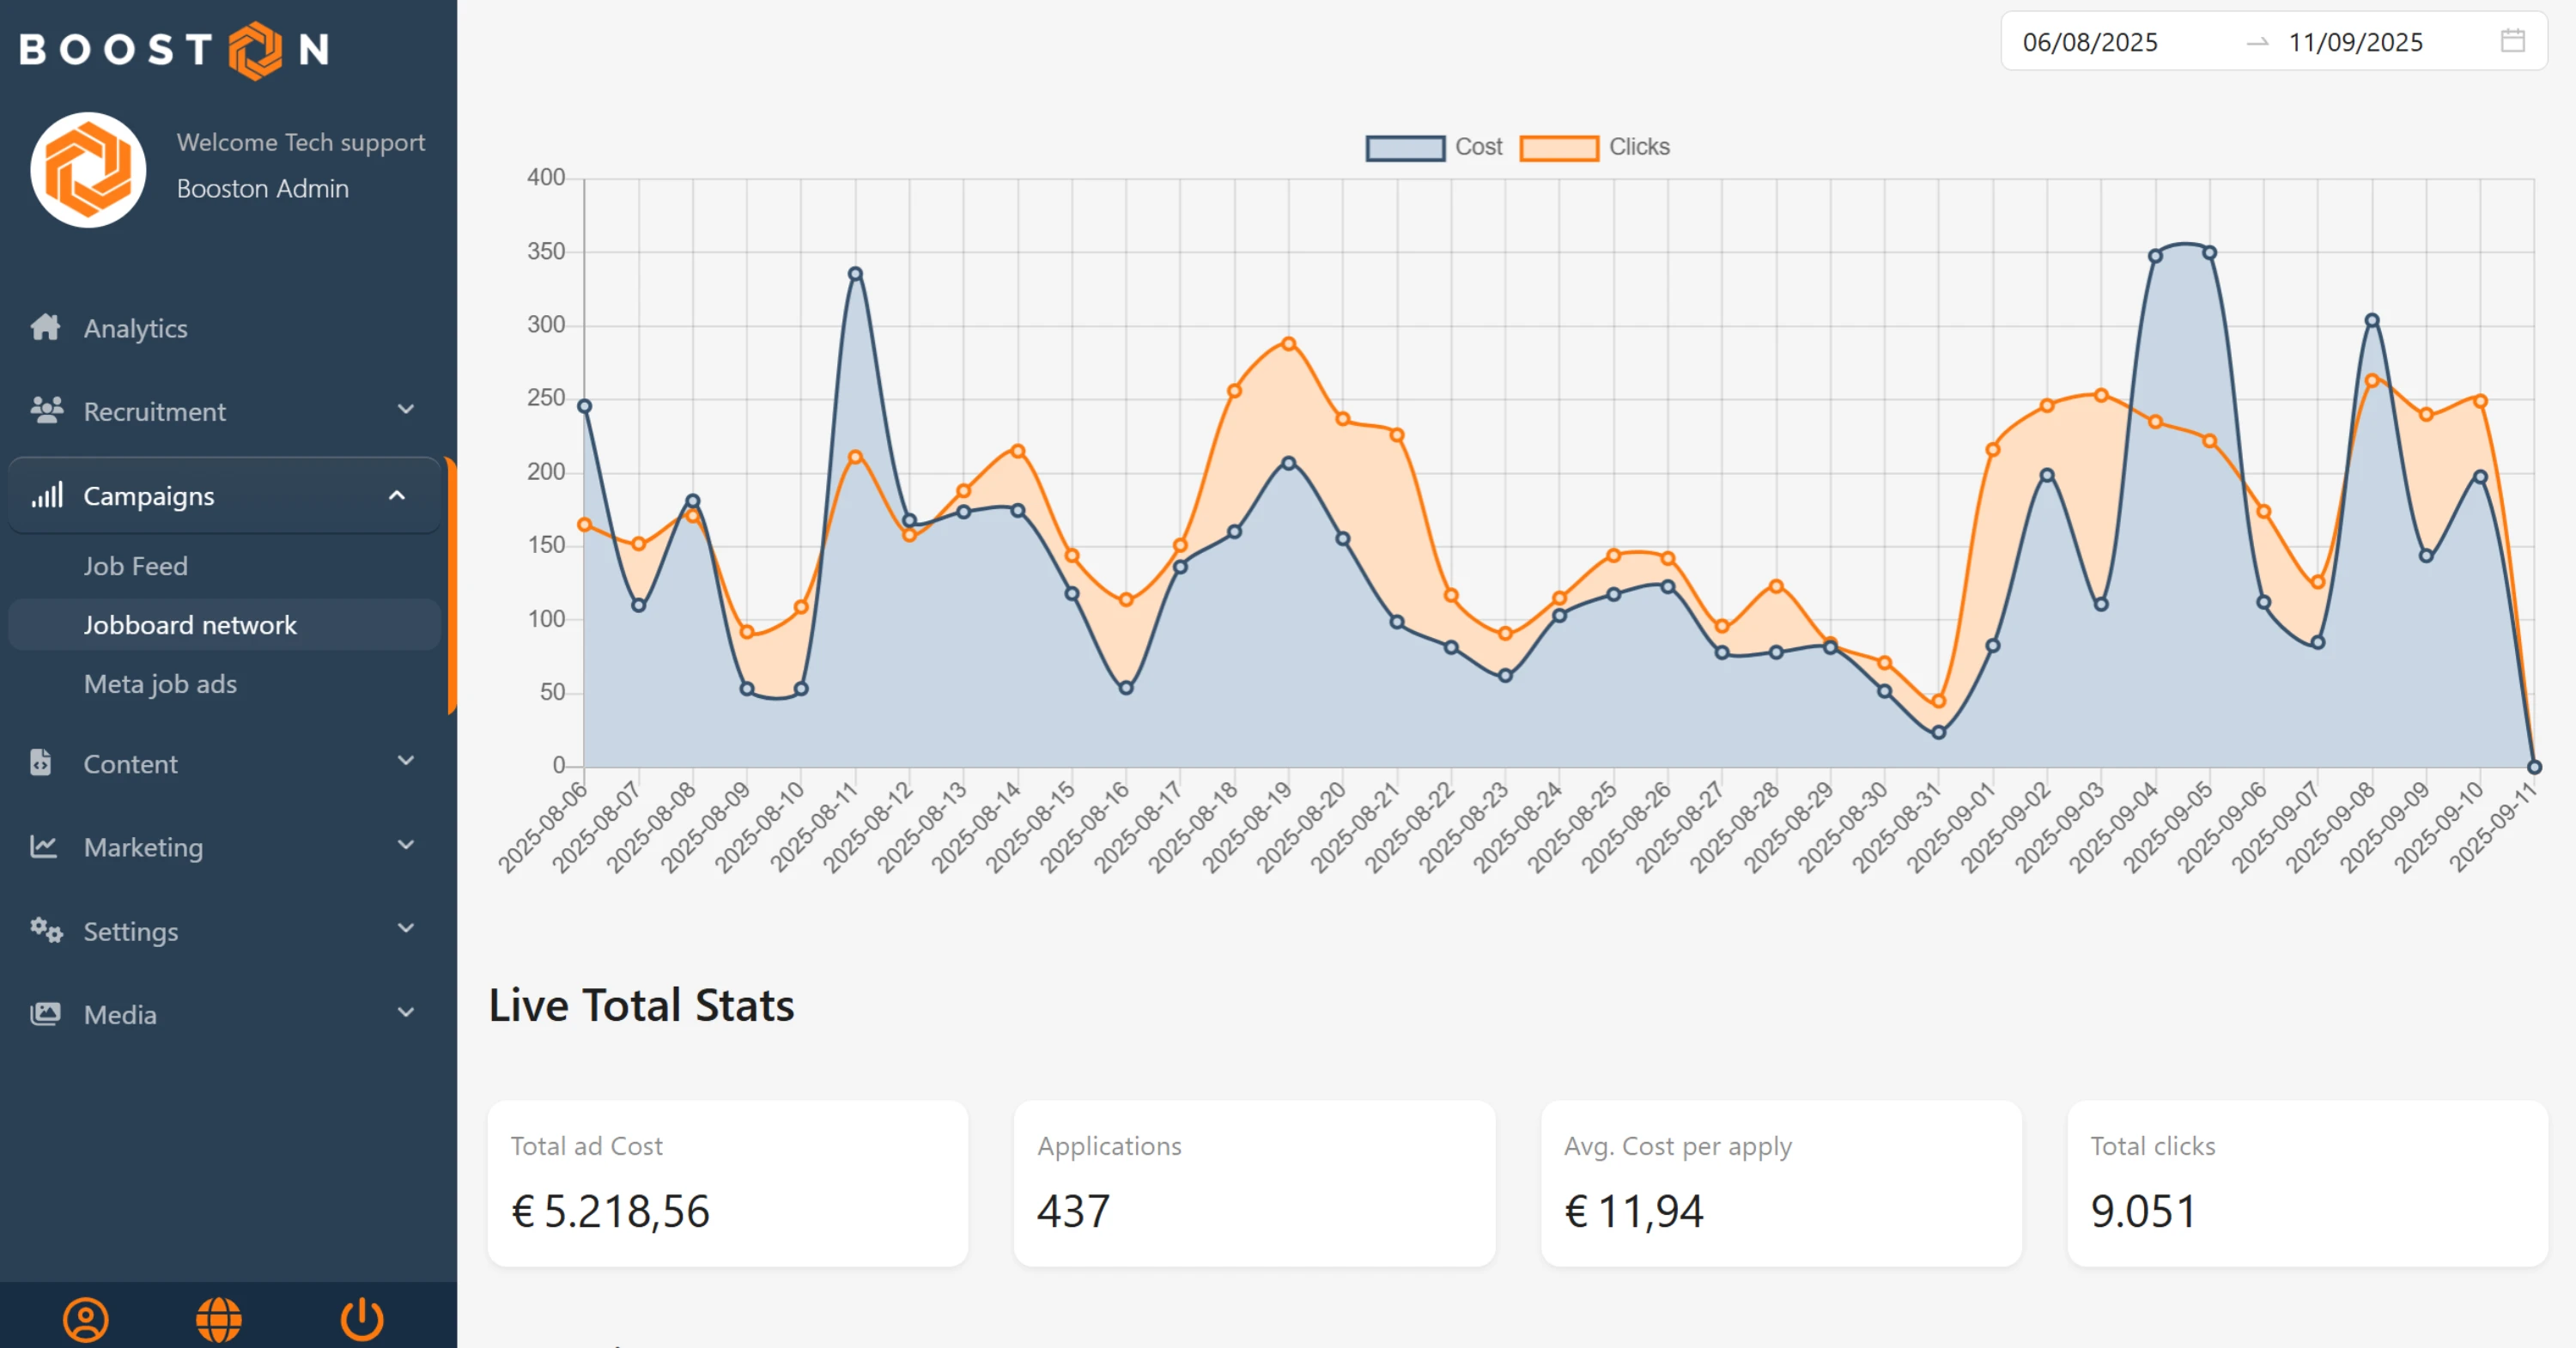
3.2 Cost & performance
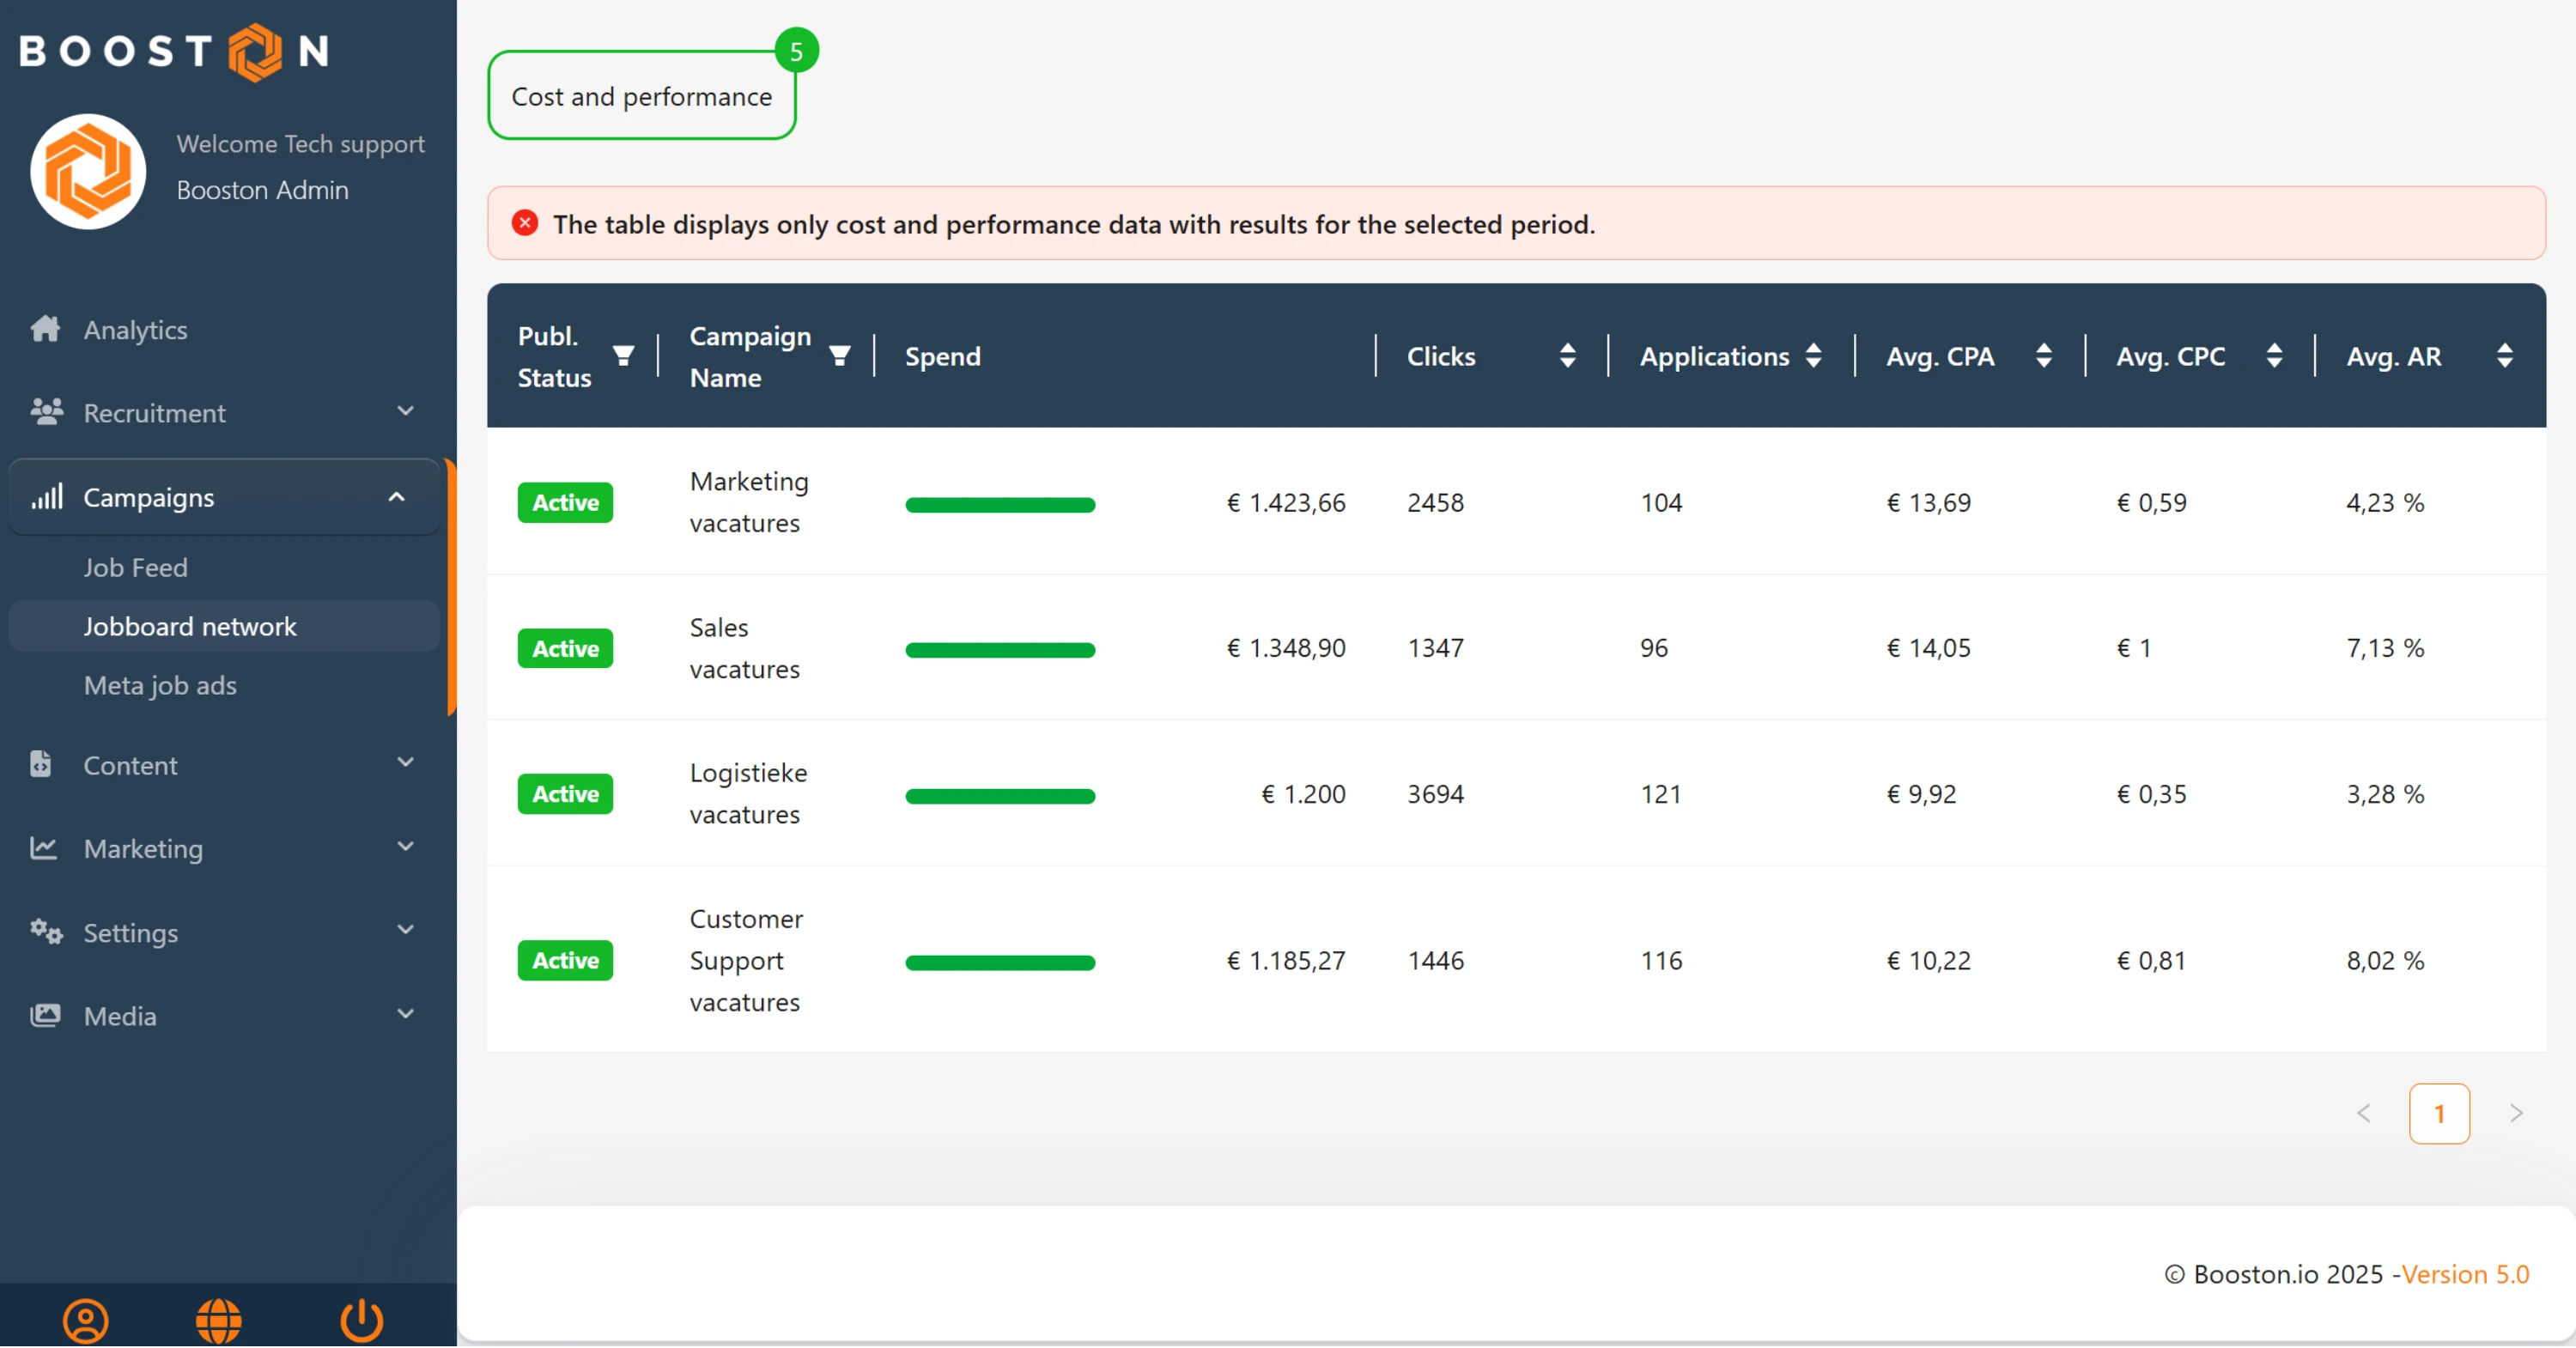
A second dashboard provides more detail:
Charts with all campaign data in aggregate.
Per-campaign detail with:
- Spend: expenditure
- Clicks: number of vacancy clicks
- Applications: number of applications
- Cost Per Application (CPA): average cost per application
- Cost Per Click (CPC): average cost per click
- Application Rate: application rate (e.g. 100 clicks → 1 application = 1%)
You can adjust the date range here to analyze performance over a specific period.
4. Optimizing campaigns
A good setup is the start, but real value comes from continuous optimization. A few tips:
Watch for high CPAs. Campaigns with a high average cost per application need attention. Check whether vacancy texts are distinctive enough and contain the right keywords.
Vacancy quality
Improve titles, body copy and employment terms to raise conversion. This often lowers CPA.
Use star ratings
When recruiters rate matches with stars, use this feedback to segment: allocate more budget to higher-rated campaigns and less to lower-rated ones.
Platform selection
Disable platforms that consistently underperform (e.g. many clicks but few applications) and increase budget on channels that deliver better results.
Trend analysis
Compare performance month over month. If CPA rises, adjust vacancy texts, targeting or budgets.
Experimentation
Run A/B tests with titles or calls-to-action. Small text changes can strongly impact conversion rate.


