This article helps you understand how to manage images within the Booston platform. We explain how to upload images, how to use them, and how to ensure they look good regardless of the usage scenario.
Contents
- Uploading an image
- Selecting your subject with a focal point
- Selecting an image for use
- Reusing images
- Conclusion
- Pro tip: working in batch
- FAQ
Uploading an image
First, we need to upload an image in order to use it. You can select an image while setting up a website page element or a campaign. In this case, we will upload the image in advance by using the file manager.
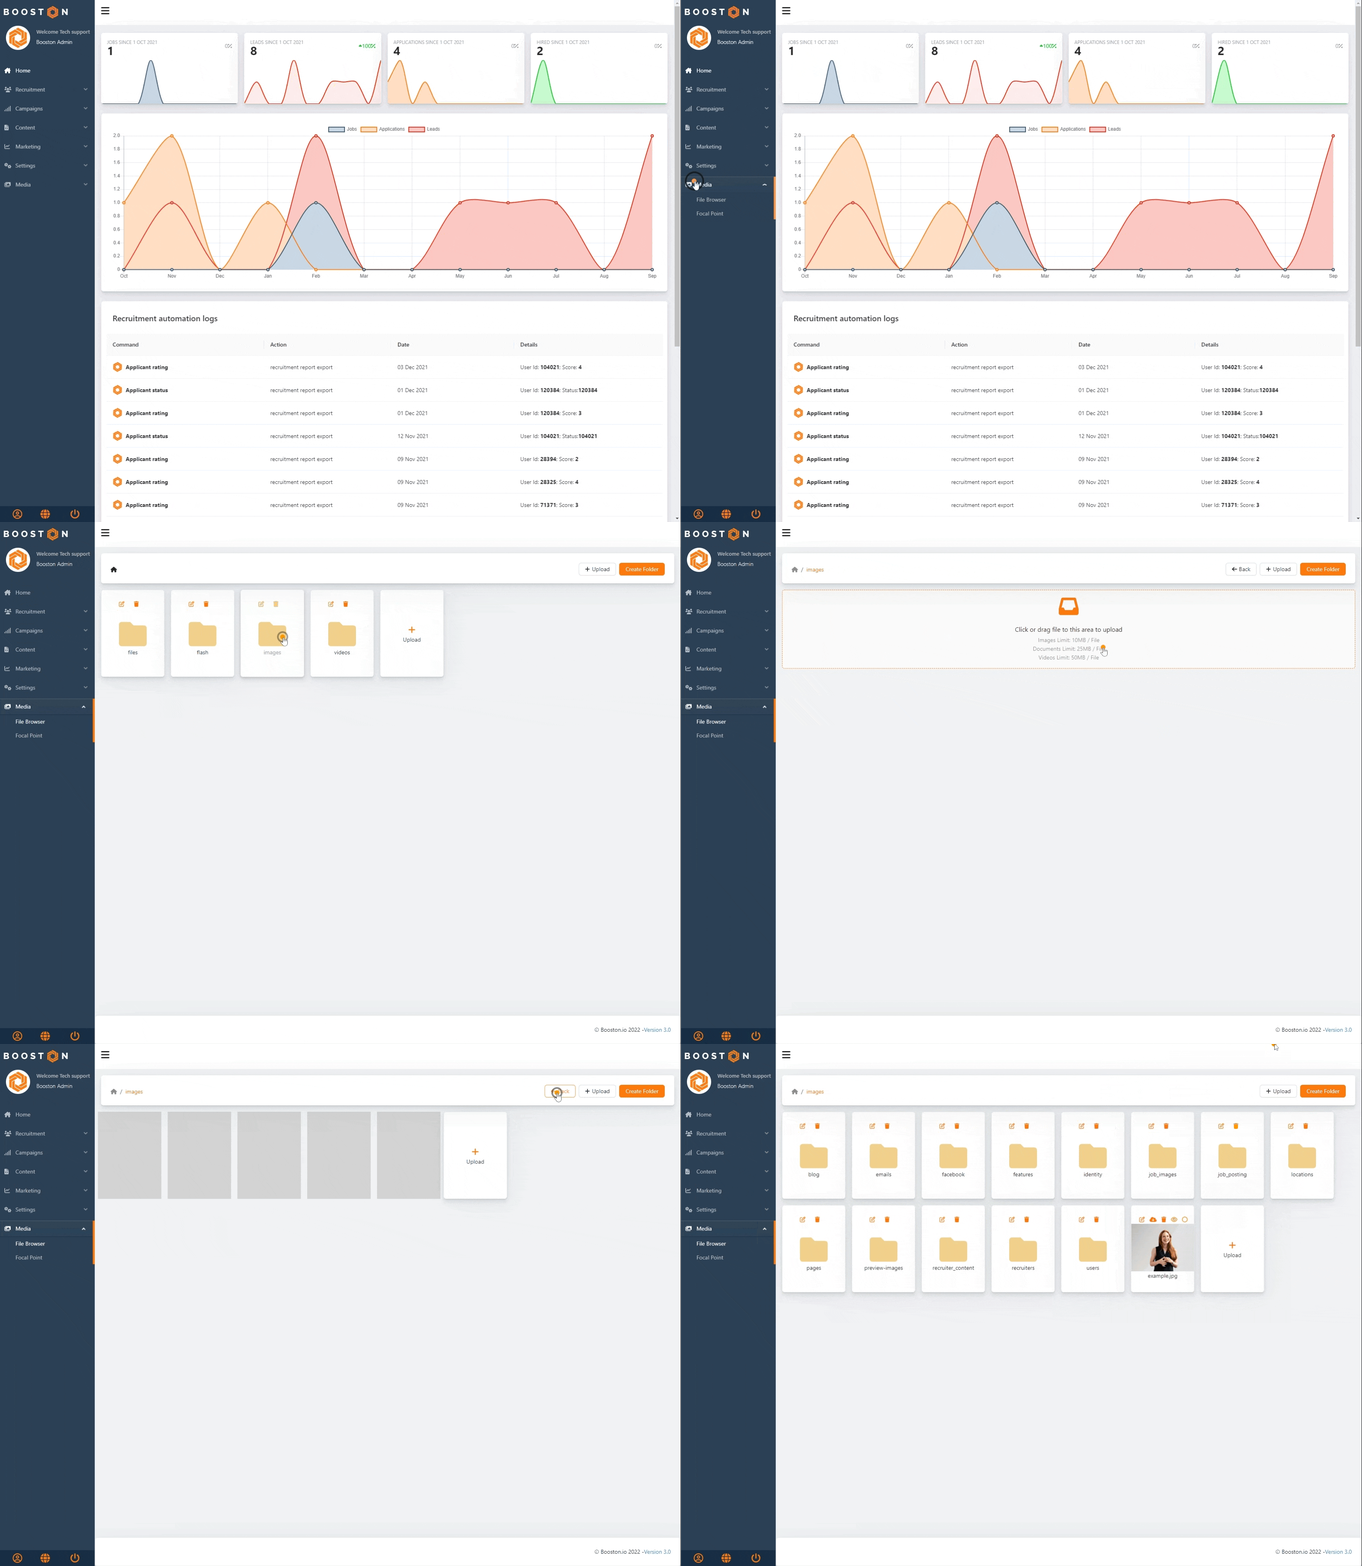
Go to: Media > File Manager. Select a folder where you want to upload your image and click 'Upload'. Then select the image(s) you want to upload and return to the folder. Your image is now uploaded to Booston.
Selecting your subject with a focal point
Anyone with the right tools can customize an image for a specific case. This means creating an image with the desired dimensions, file size, sharpness, and subject positioning. This option is always available, allowing you to easily upload and select your tailored image for use. If this applies to you, consider disabling Booston’s image optimization:
Go to Settings > General > Image resolution quality > set it to "Off: No image optimization".
However, Booston can also automatically optimize images for the web. This is done by first selecting the subject of your image using a 'focal point'.
Navigate to your uploaded image > click the focal point icon. A pop-up will appear showing your image along with previews in different dimensions. These previews demonstrate how the image would look without setting a focal point. Now select the focal point tool and set it to the desired position. You will notice that the preview images are now focused on that spot across all sample dimensions.
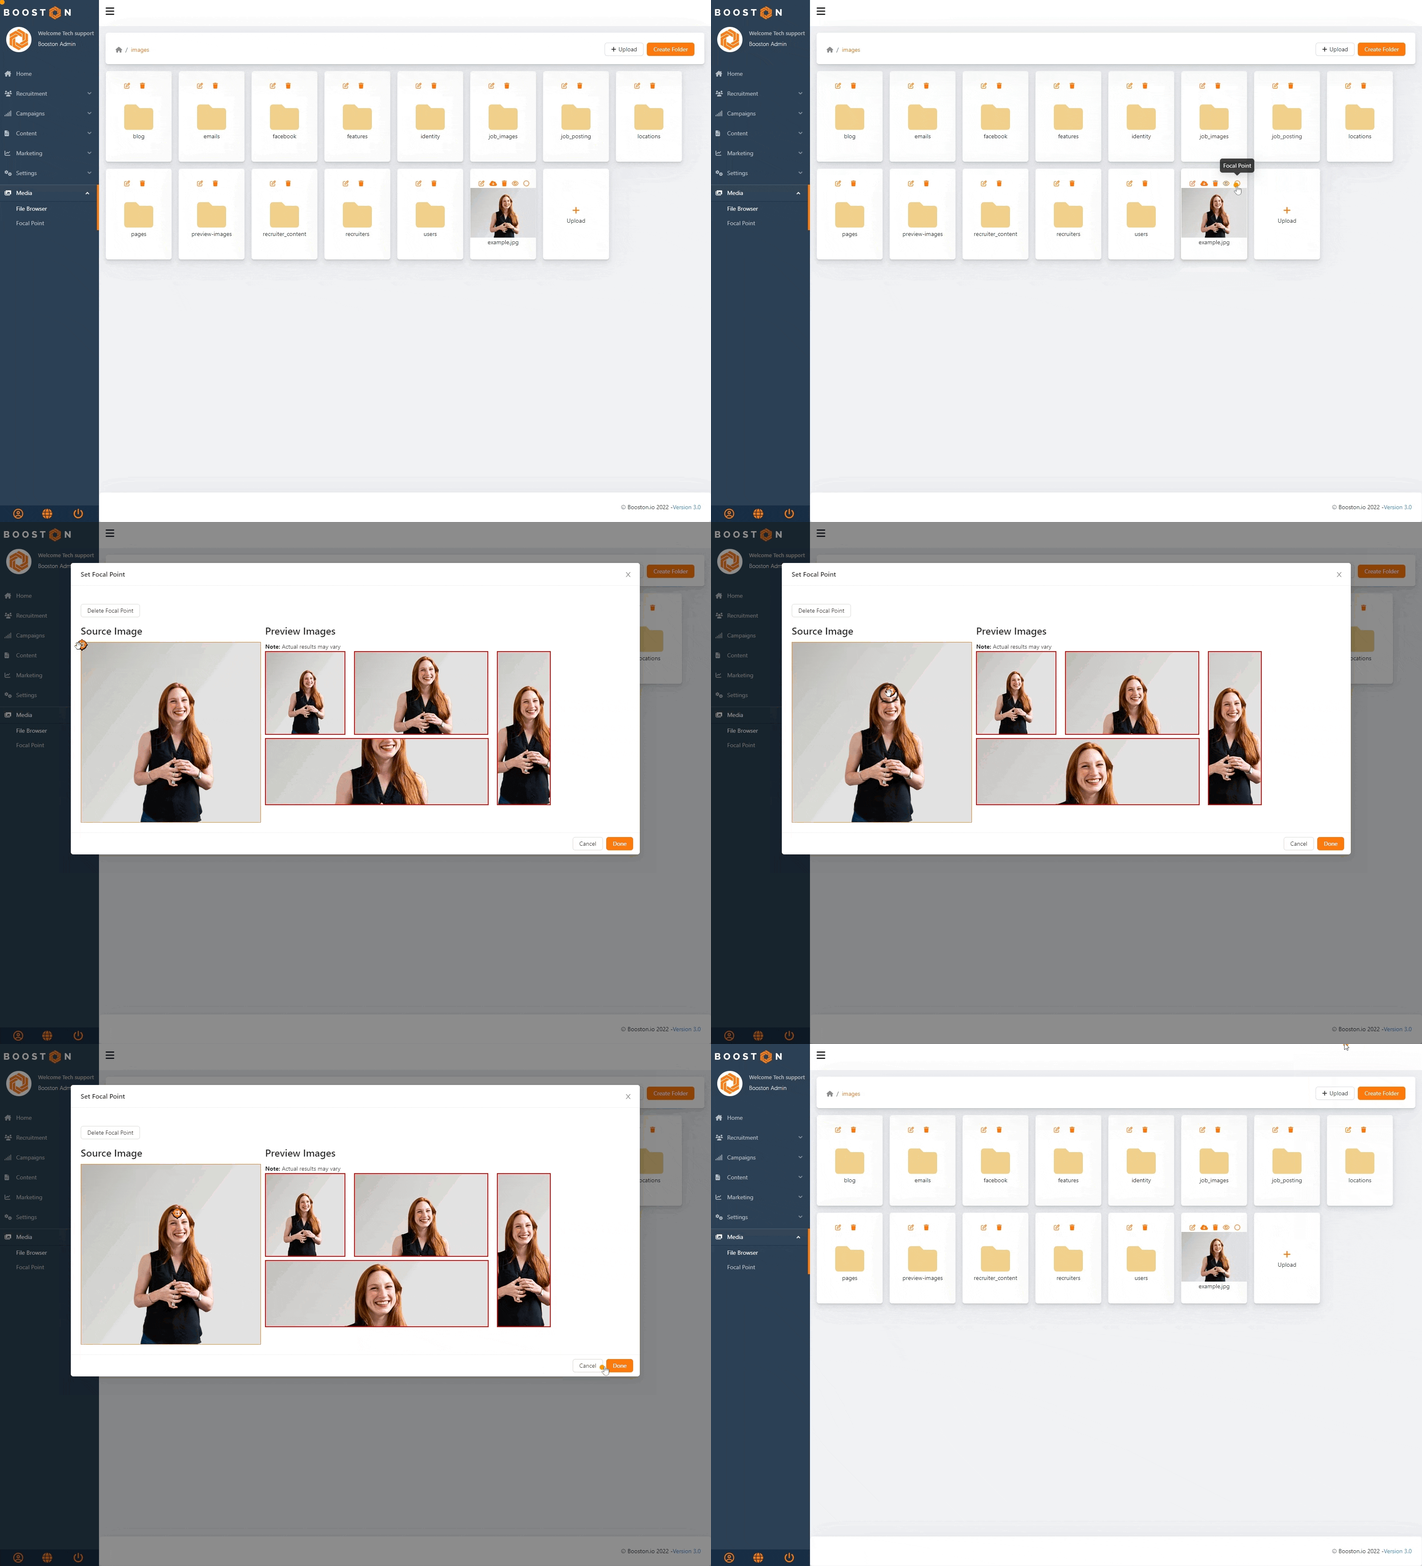
Regardless of the situation, your image will now display the subject centrally, and the file size will be reduced for faster loading times. More on this in the next chapter.
Selecting an image for use
We can now select the image for use. The image can be used for various scenarios, ranging from campaigns to page elements on your website. In this example, we will add the image to a page element.
If you want to add your image to a page element, go to: Content > Page Elements > edit a page element. For the image, click 'Find or Upload File'. The file manager will open. Navigate to your image and select it. Then save the page element by clicking save.
(Note: at this stage of selecting an image for use, you can also combine uploading an image, setting a focal point, and selecting the image in a single operation.)
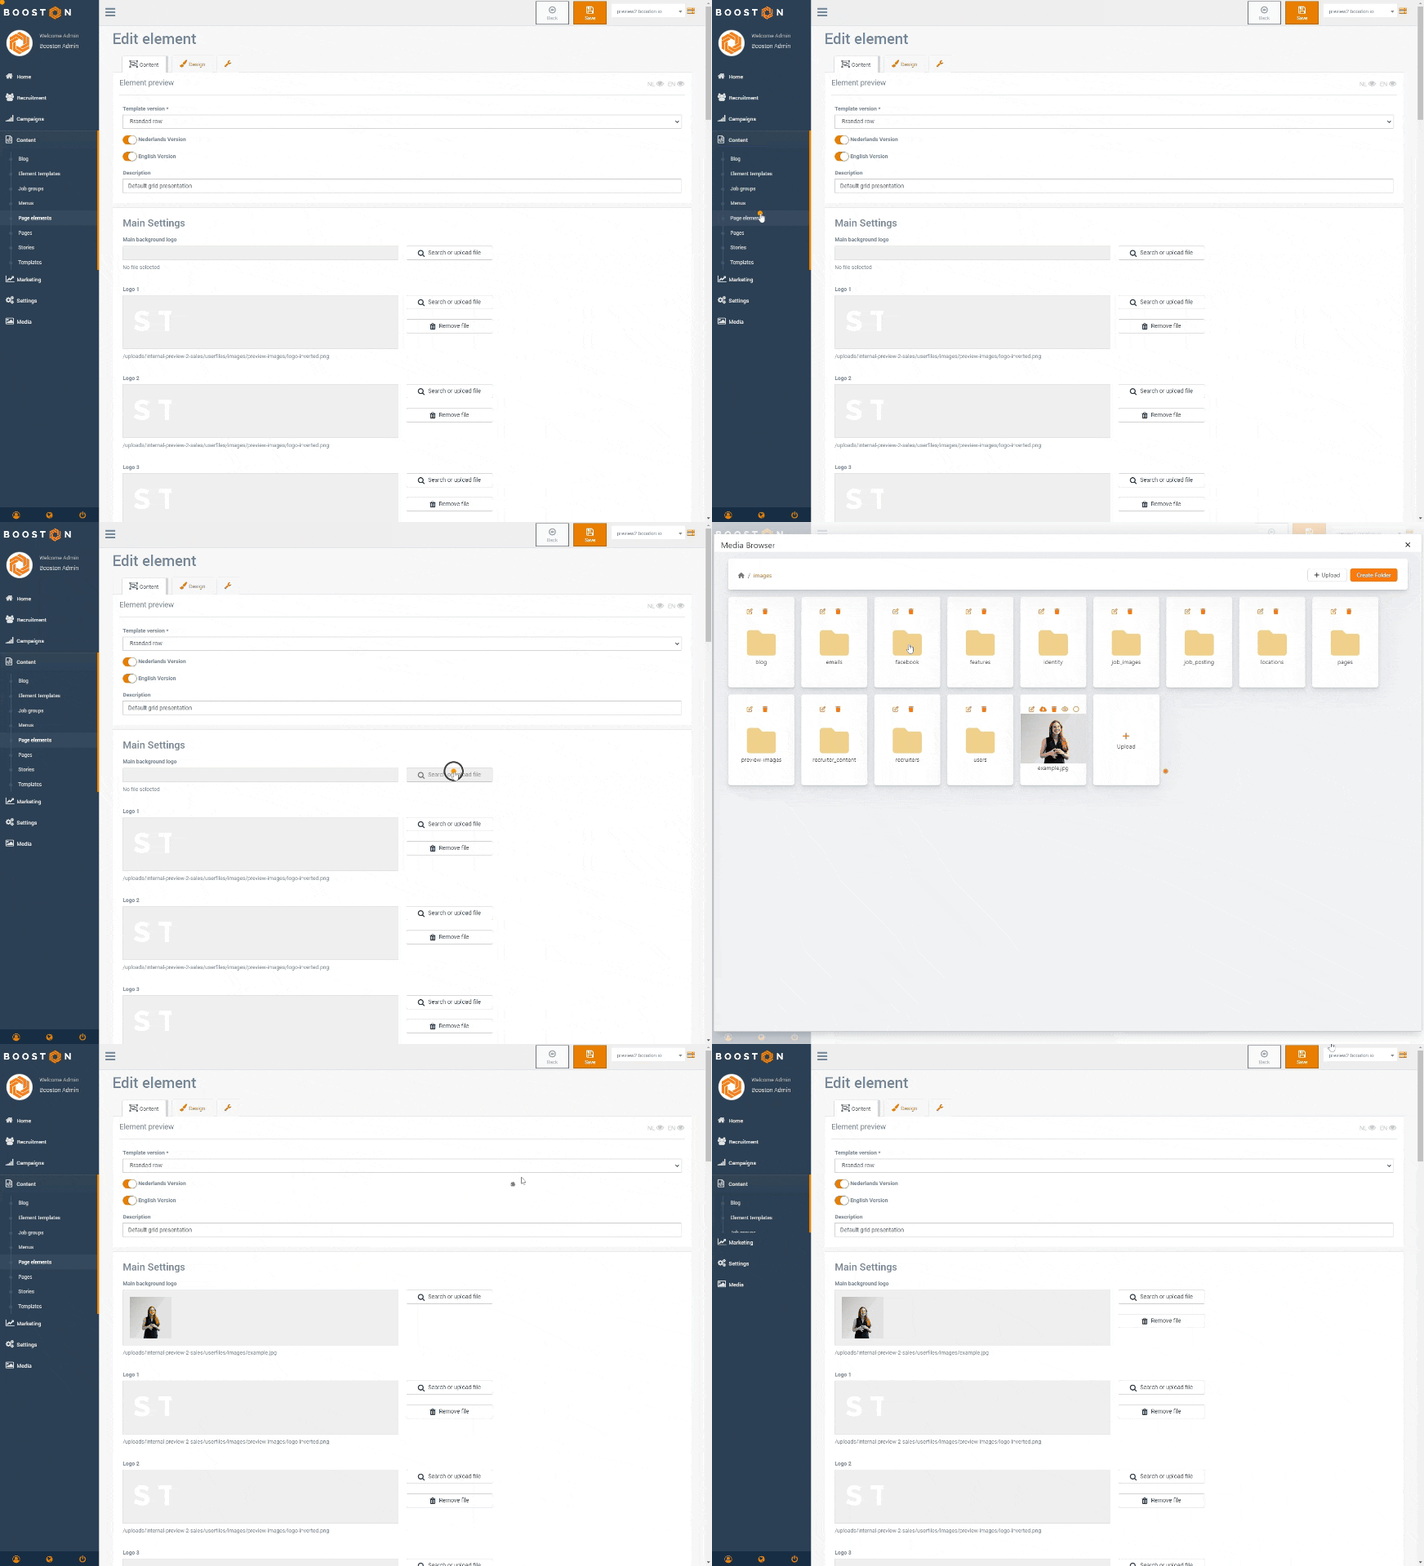
Now that we have selected the image for the page element, a number of things happen automatically. This is best explained by looking at how the image is displayed on the website. Here is the result:
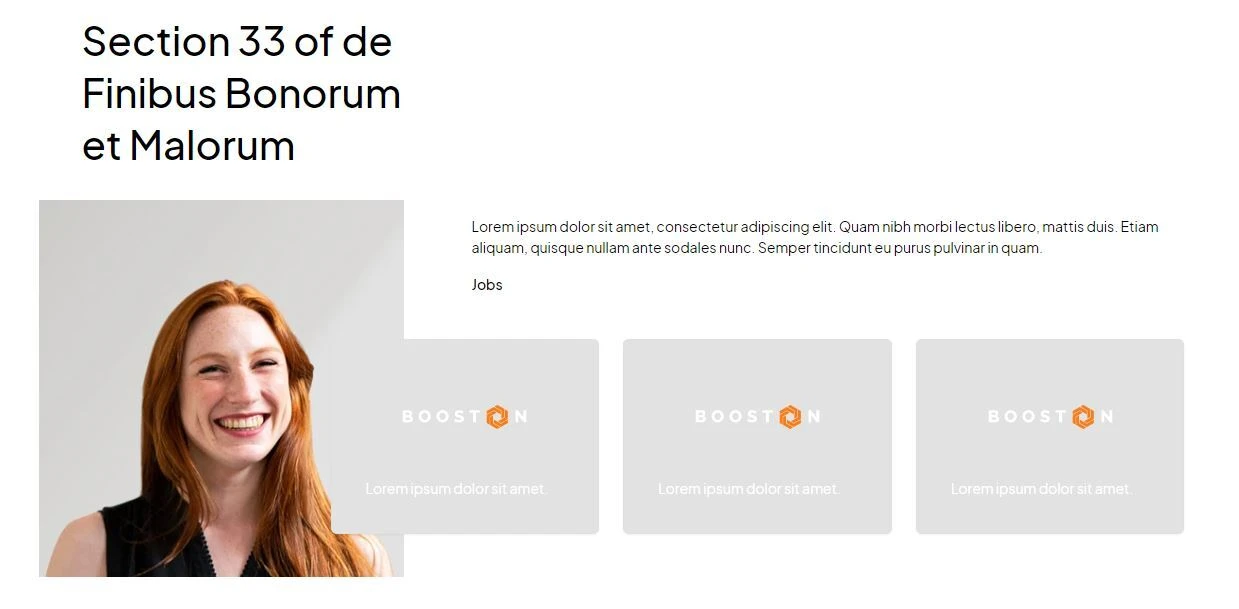
The image is automatically focused on the selected subject and remains very sharp in presentation.
The image is cropped. This means that unused parts of the image are removed, resulting in a smaller file size and faster loading times. If we were to add the same image to another page element that might be more vertically oriented, different parts of the image would naturally be cropped. For each page element, an optimized version is created automatically. An example of a more vertically cropped image might look like this:

The image is then adjusted to the required dimensions (in pixels). For example, the first image is resized to 348 × 377 pixels, and the second to 288 × 377 pixels. The original image was 1200 × 1200 pixels. In other words: the total reduction is approximately 80 to 90%, which increases loading speed without loss of quality.
The image is converted to WebP format. This is an image format developed by Google that minimizes file size without quality loss.
Finally, lazy loading is applied: images are only loaded when they come into view (above the fold), reducing the initial page load time.
Conclusion
In this article, we uploaded an image, set a focal point, and added it to a page element. This ensures that the subject remains clearly visible, loading times stay low, and the visual presentation is optimized — all without manual cropping or optimization.
The file size of the image was automatically reduced from approximately 2 MB to 12 kB — a reduction of around 97%. Depending on the device, this saving can be even greater. For mobile users, smaller versions are automatically prepared, resulting in faster websites, better performance on slower networks, and higher rankings in search engines like Google (SEO).
Protip: working in batch
Do you want to manage many images at once and speed up your work? Then make sure to select multiple images when uploading. Afterwards, go to:
Media > Focal Point > "your image folder" > click on an image > set a focal point > quickly move on to the next image, and so on.
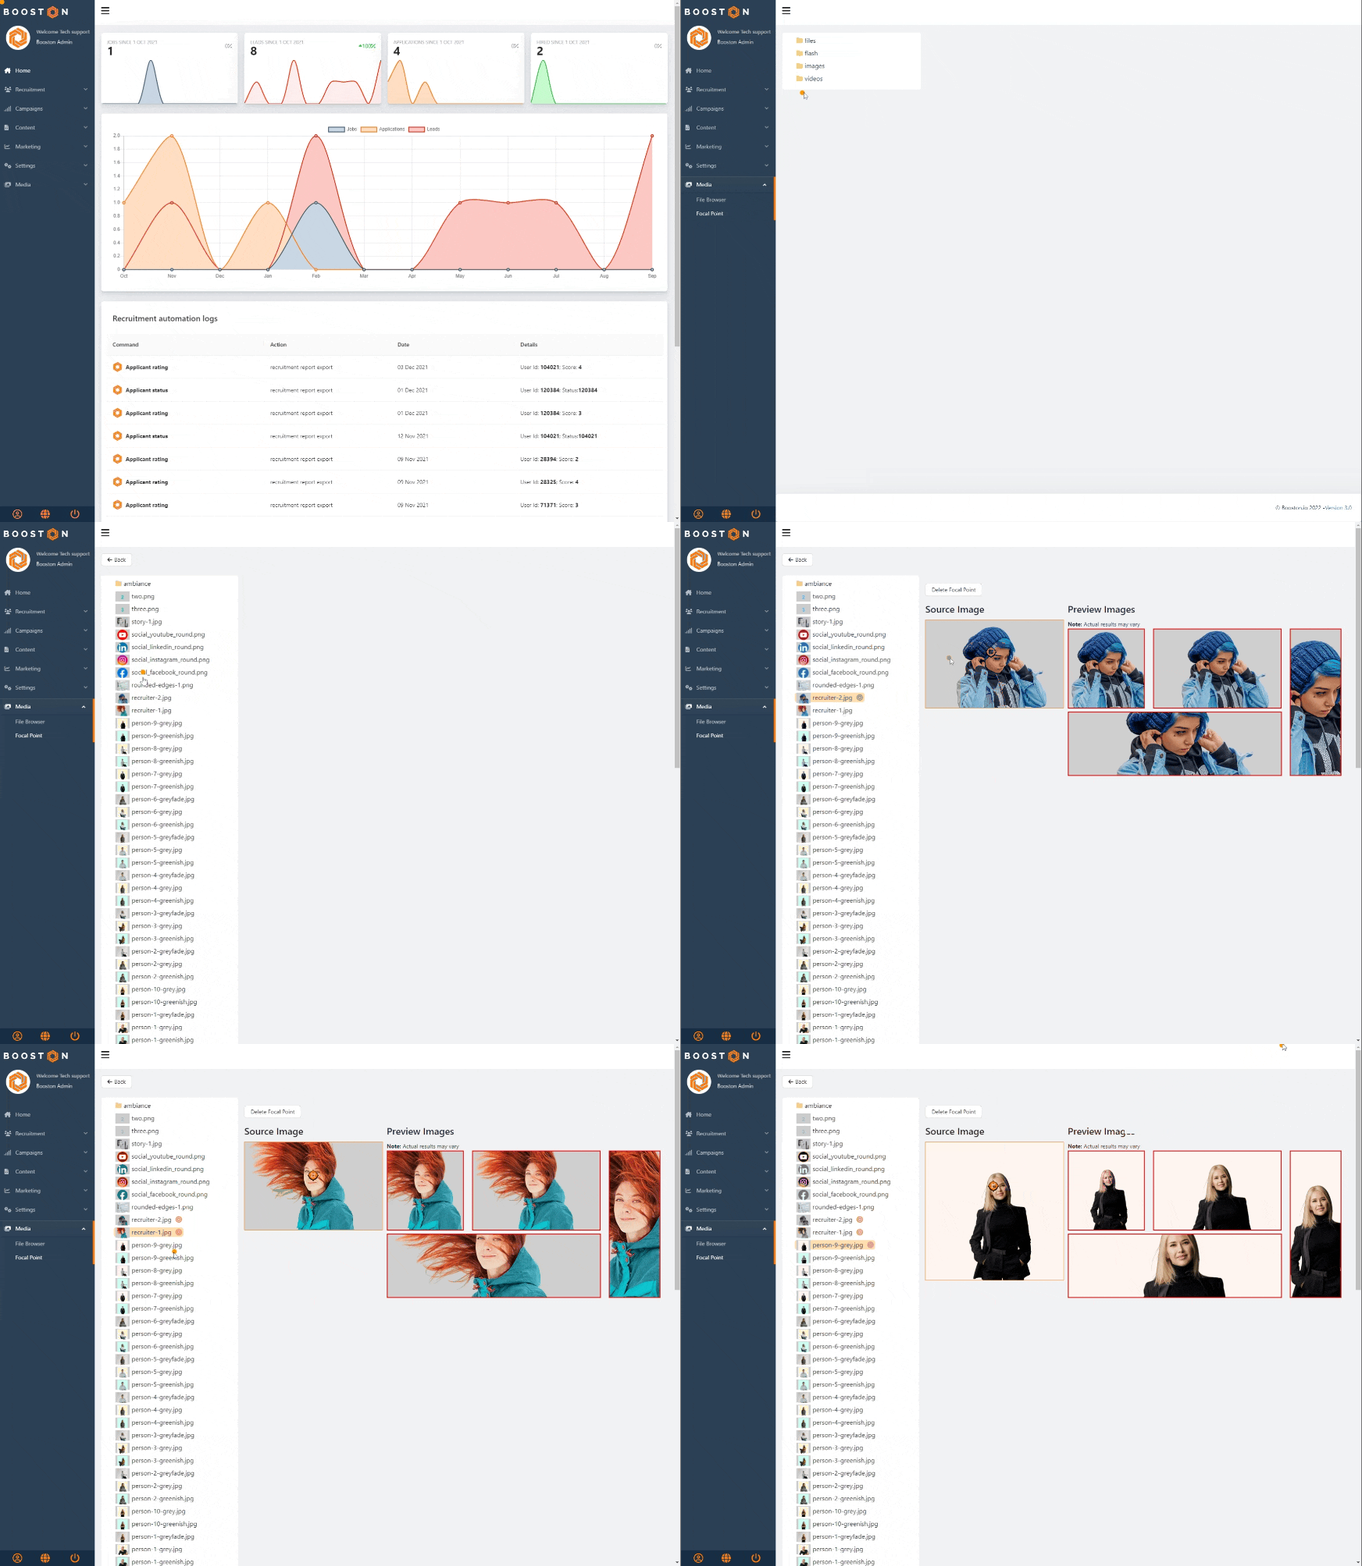
In this way, you can set all your images at once. Afterwards, when you add an image to a campaign or website, everything will be automatically optimized without any additional actions.
FAQ
- Which image formats are allowed?
.jpeg and .png are optimal. These formats can be automatically optimized by setting a focal point and reducing the file size. Other formats such as .svg and .gif can also be uploaded and used but are not automatically optimized. - What dimensions should I use for an image?
Keep the file size under 10 MB and use the highest possible resolution. Booston automatically adjusts the dimensions based on the usage scenario. The image will be converted to WebP format and reduced in size. Setting a focal point is recommended to ensure the subject always remains visible. - Can I disable automatic image optimization?
Yes. You can disable this via Settings > General > Image Resolution Quality > set it to "Off: No Image Optimization". Please note that you will then need to manually provide an optimized image for each use case and ensure a small file size to maintain good performance.


