Implementing Google Analytics on your career or recruitment website is crucial for gaining complete insight into your visitors’ behavior from source to placement. By using this powerful analytics tool, you can precisely track how candidates find your website, which pages they visit, and what actions they take. This enables you to optimize your recruitment strategies, refine your marketing efforts, and ultimately improve the effectiveness of your recruitment processes. In this article, we guide you step by step through setting up Google Analytics so you can gain the valuable insights needed for successful recruitment.
Contents
- Create Property
- Set up Data Stream
- Custom Definitions
- Data Settings
1. Create Property
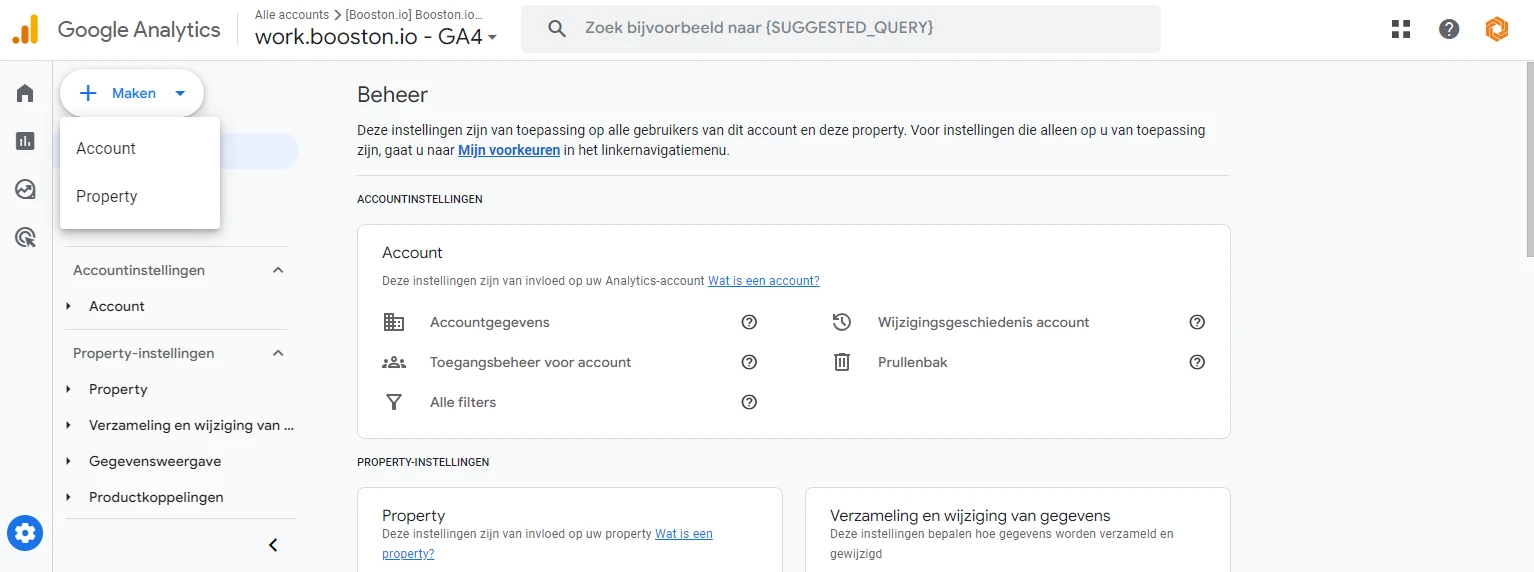
Admin
- + Create
- Property

Admin > “+ Create” > Property
- Property name (e.g.: work.booston.io)
- Time zone: Netherlands
- Currency: Euro
Describe your business + Business goals
- Vacancies and training
- Generate leads – Boost online sales – Analyze user behavior
Start collecting data
- Web
2. Set up Data Stream
Set up data stream
- Enter URL (e.g.: www.work.booston.io)
- Stream name (e.g.: work.booston.io)
Web stream data
- Enter Measurement ID in the Booston General Settings dashboard
- API secrets for Measurement Protocol
- Review and confirm conditions
- Create
- Name: “Booston” -> Enter secret value in Booston dashboard
In your Booston environment, go to Settings > General and enter the Measurement ID and API secrets for the Measurement Protocol.
3. Custom Definitions
Data view > Custom definitions
| Dimension name + Description | Scope | Parameter |
| action | Event | action |
| category | Event | category |
| job_id | Event | job_id |
| job_recruiter | Event | job_recruiter |
| job_title | Event | job_title |
| label | Event | label |
| transaction_id | Event | transaction_id |
| type | Event | type |
| job_position | Event | job_position |
| user_id | Event | vis_id |
go to > Custom metrics
| Dimension name + Description | Scope | Parameter |
| value | Event | value / currency (enable both options) |
4. Data Settings
- Data settings
- Data collection
– Data collection via Google Signals
– enable
– enable - Data retention
– 14 months


